Panel Page
Firewall Forward
Interior Installation
Paint
5/4/99; 3.5 hrs; fiddling with Navaid servo; wired Lowrance Airmap 100
into panel.
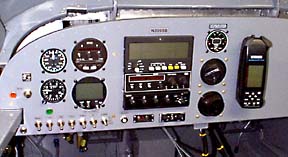
Airmap 100 fits nicely to the right of fuel gauge. Power and data cable
come through panel behind bracket.
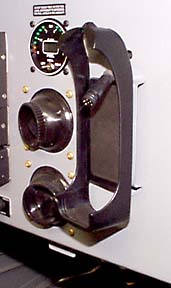
The Airmap needed to be angled slightly to the left so I could look
straight into the display. I fabricated a bracket that mounts the cradle at the desired
angle. I am hopeful that the unit will not need the external antenna; The supplied
external antenna will be easy to mount on the glareshield if necessary.
5/5/99; 1.75 hrs; more fiddling with the Navaid.
5/7/99; 3.5 hrs; completed installation of platenuts for wing root
fairings; removed right wing.
5/8/99; 4.25 hrs; riveted top forward skin (no more easy access to the
wiring!); bled brakes; drilled axles for cotter pins.
5/10/99; 1.75 hrs; riveted upper cowl hinge to firewall; getting ready to
install spinner. Be sure you download
the spinner cutout diagram from Sensenich if you are using the fixed pitch metal prop
on an RV4 or RV6.
Here is a tip I picked up from poking through the RV-List archives and
originally submitted by Jerry Springer. You need to establish two marks exactly opposite
each other on the side of the spinner dome.
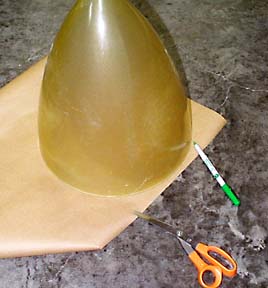
Draw a circle using the spinner as a template. It would be best to do this
with the backplate in place; I will originally trim the cutouts undersize so a little
leeway is possible.
Fold the paper disk eaxactly in two; The line illustrates the fold line.
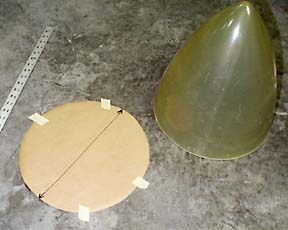
Set the spinner over the paper and transfer the two marks to the spinner dome. Now you can
extend the marks up the dome with a square. The marks locate the center of the prop blades
as indicated on the Sensenich diagram.
5/12/99; 5.5 hrs; spinner completed.
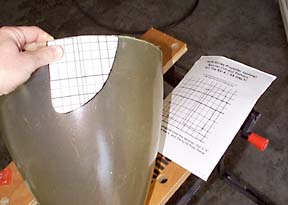
Here is the downloaded cutout template from the Sensnich web site. If you
print it at the proper scale, it should be very close to the proper size and
shape. Line up the blade centerline mark on the template with the mark you put on the
spinner.
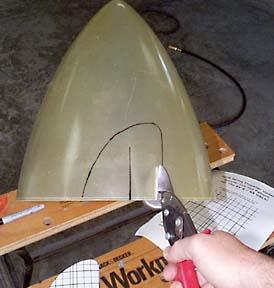
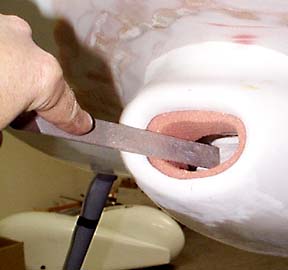
Tin snips easily cut the fiberglass. I started out by cutting about
3/16" inside the lines, but ended up cutting right on the line. The template is very
accurate.
After four pilot holes were drilled in the rear bulkhead, I checked the
runout of the spinner. It was true within 1/16" of an inch........I don't know
why.....
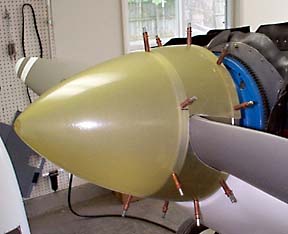
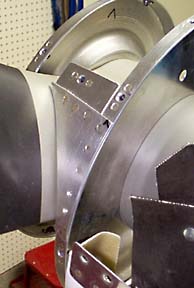
All holes for the platenuts drilled. The dome had a line scribed along the
edge which turned out to be an accurate point to use for lining out the spinner with the
backplate.
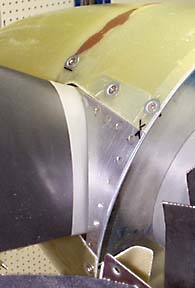
Detail of the gap filler plate. It is made from .063" stock.
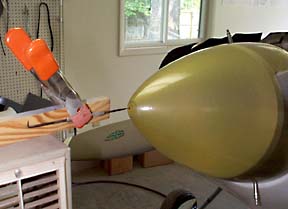
The forward bulkhead was slightly undersize. I waxed the bulkhead, and put
a bead of glass-reinforced Bondo on the bulkhead. The spinner was then put in place so the
Bondo would form a spacer between the bulkhead and spinner dome.
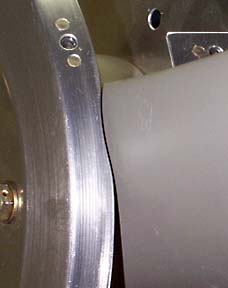
The forward bulkhead needs to be relieved slightly to prevent it from
contacting the prop.
5/13/99; 0.75 hrs; working on fiberglassing air intake duct.
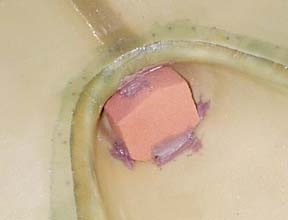
A foam block is glued into place where the air duct will go. I used Bondo
to tack the block.
The lower cowl was installed and a file was used to form the duct.
5/14/99; 3.0 hrs; completed air intake duct; attached air seal to airbox;
riveted lower emp fairings.
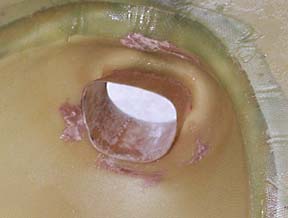
Here is the duct after the layup is complete and the foam is chipped out.
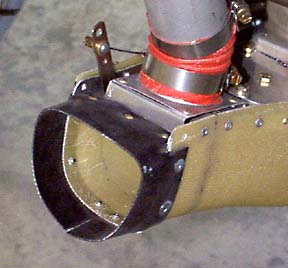
Air seal is riveted to the air box. Notches will have to cut in the seal
so the cowl can be installed.
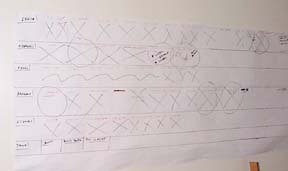
Several months ago I took the back side of a three view and made a list of
all tasks remaining until completion. Each task was placed into the appropriate category
(panel, engine, fiberglass, etc.). The list kept me from just wandering all over the
project and wasting time. Nearly everything has now been crossed off the list!
Since you can't read the above photo, the following will give you an
example of what was on my "To Do" list. I divided the remaining tasks into major
portions of the project:
Engine; install senders, oil cooler, baffles, mag
harness, filter box, prop, exhaust, heat muffs, baffles, spinner, etc. Under each task I
listed items that needed to ordered, when they were ordered, and when they arrived. Of
course you could subdivide each task if you desire.
Fiberglass; canopy, emp fairing, wheel pants,
intersection fairings, cowl air intake.
Panel; finalize layout, cut/drill panel, trial fitup,
paint, install components, fabricate wiring harness, create labels, smoke test.
Airframe; drill/rivet forward skin, cowl, lights/strobes,
gear fairings, antennae, bleed brakes, elevator trim, drill axles.
Final assembly; upholstery, install aileron gap
seal, attach wings, pitot lines, flap links, aileron pushrods, wing tips.
Paint; build booth, procure supplies, prep airframe.
Your list will have different items but should be similar in scope.
Whenever I felt that I was just "idling" I would walk over to the list, select a
category, pick a task, and do it! This also serves as a great flow chart in that you can
look ahead and see what items need to be ordered so you don't get hung waiting for parts
to arrive.
This list must remain active in order to be most useful. You will
continually think of additional items; write them down now so you can encorporate
them into the flow.
But the most valuable part of the task list is that it keeps you on track!
Right in front of you is the "Light at the End of the Tunnel". It is
invigorating to be able to mark off a task (especially one you have been dreading!), walk
out of the shop, and be thinking ahead to the new task tomorrow when you will arrive ready
to put another part of the list behind you.
But..........eventually you will run out of tasks! And that brings us to
the next step........
7/31/99; N399SB is at the airport!
For the first time since November 28, 1997, there are no airplane parts in
my shop. It is an exciting.......yet somewhat sad........feeling to walk into the shop and
see no evidence of the project that has been such a large part of my life for the past
twenty-one months. But, this is what we look forward to when we start one of these
projects. So from now on, the RV6 saga will continue at DCU instead of the cozy little
shop in the backyard.
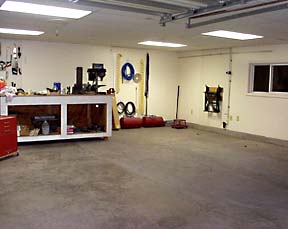
The nest is empty.......
Total time for finish kit; 205.5 hrs.
Forward to Paint Page
Back to Finish Kit, page six
Back to RV6 Home Page
Please submit all questions and comments to sbuc@hiwaay.net
|

