Panel Page
Firewall Forward
Interior Installation
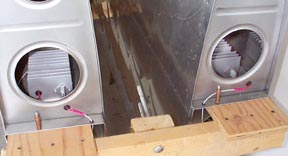
3/6/99; .75 hrs; mounted Aeroflash power supplies in wings. These are the
double flash units.
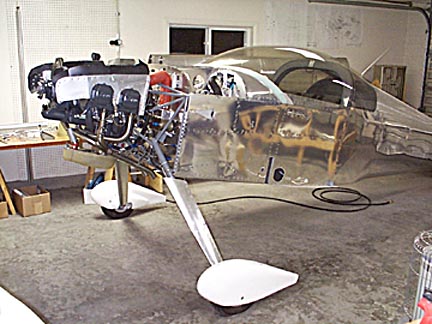
3/6/99; 6.0 hrs; installed interior and restraint harnesses. Click here to go to the Interior Page.
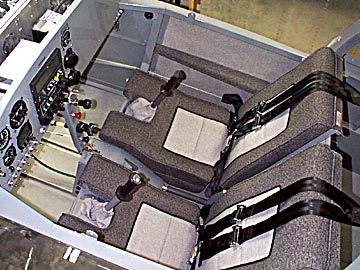
This baby looks like it is getting ready to fly! All that remains to
finish interior is installation of carpet.
3/7/99; 2.0 hrs; completed installation of landing lights.
3/8/99; 2.0 hrs; working on gear leg fairings.
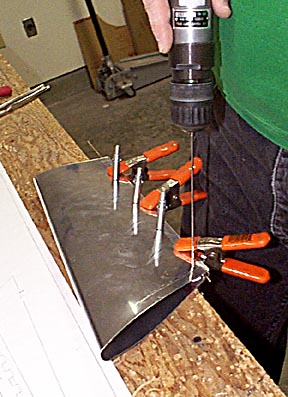
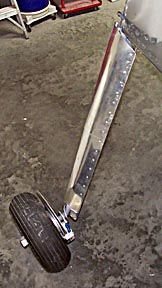
Spring clamps hold the trailing edge of the fairing together as the hinges
are drilled.
The fairing is held together by a hinge. The fairings are in two pieces so
they will not buckle as the gear flexes.
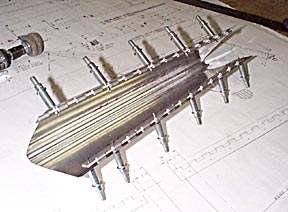
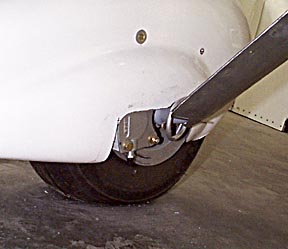
The completed left fairing. The hinge pin protrudes into the fuse to keep
the fairing from rotating. Care needs to be taken to align the fairing with the centerline
of the plane to prevent the fairing from acting as a rudder!
A bracket is fabricated for the bottom of the fairing and is attached to
the gear leg with a hose clamp.
3/9/99; 3.75 hrs; completed gear fairing installation; installed wheel
pants.
Here is the cutout I found necessary to get the pants to fit over the
brake calipers. The plans showed a cover over this cutout but I can't figure out how it
would clear the caliper. I will attempt to cover the whole mess with the intersection
fairing.
3/11/99; 2.25 hrs; fabricated and installed oil filler door on cowl.
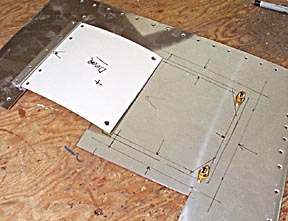
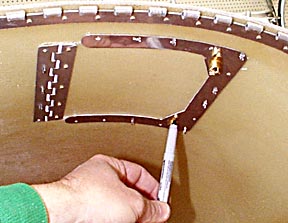
Door was cut from cowl with a cutoff wheel. Shown is how the flange for
the door was laid out.

Flange is clamped to cowl as rivet holes are marked and drilled. No need
to secure the hinge pin; it is trapped by the door opening.
With the door is place and Camlocs inserted and latched, mark the rivet
holes for the camlocs. Remove flange, countersink holes and rivet camlocs to flange. The
flange can now be riveted to the cowl.
3/14/99; 1.75 hrs; fabricated and installed map pockets; installed holder
for passenger side control stick.
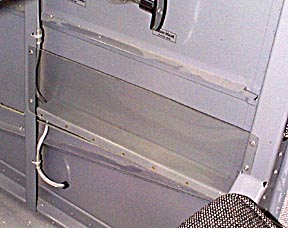
Map pockets consist of a piece of Lexan and an angle formed from
0.025" stock.
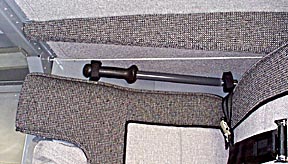
Right side control stick is stowed on floorboard. Stick is secured by
broom clips and strips of velcro.
I intend to be very selective about who is allowed to take
control of the "Wing Removal Lever"....
Forward to Finish Kit, page five
Back to Finish Kit, page three
Back to RV6 Home Page
Please submit all questions and comments to sbuc@hiwaay.net
|

