Sam Buchanan's RV6 Interior Installation |
 |
|||
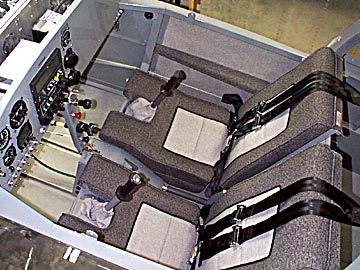
You know how it is. You arrive at a flyin pancake breakfast and the first thing about your airplane the airport lounge lizards check out is.........the panel and the upholstery (after they grade your landing, that is). You might be hiding a turbocharged 550 cubic inch Briggs and Stratton under the cowl, but the first impressions will be largely formed by how the plane looks in the cabin. So, since the panel in N399SB is bound to raise some eyebrows among the traditionalists, I decided to install some seats that anybody could appreciate. After some window shopping, I decided to go with the interior supplied by D.J. Lauritson of Cleaveland Aircraft Tool. Besides having the finest upholstery I have seen in RVs, they also support "The RV Journal" which means they are all-around nice people! A call to D.J. with the colors I had in mind resulted in an envelope arriving in the mail with info and many fabric samples. Too many samples. I just thought I knew what I wanted in the way of colors and patterns. After deciding to complement the lucious shade of Rustoleum "Smoke Gray" that was sprayed around the cabin, it was just a matter of deciding which grays to use. After a session in the shop arranging fabric samples in various combinations, the color scheme was finalized.
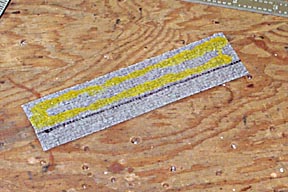
The colors may not reproduce very accurately on your monitor, but the darker surround is a mingled gray tweed, and the inserts are light charcoal gray. Since I want to keep the cockpit simple and light, the only other accessories chosen were armrests and fabric for the "elbow" sidewall. What follows are some photos of the installation process. Needless to say, the quality of the D.J. seats is first-class. They fit perfectly right out of the box, and the armrests and stick boots were ready to install. The only actual fabrication necessary was the installation of the sidewall fabric and stick boots. The very same process would be followed if you decided to order the entire catalog of options. The fabric attaches to the sidewalls with a combination of aerosol and liquid contact cement. D.J offers the adhesives or you can get them locally as I did. The aerosol is the stuff that is used to install vinyl auto tops, and the liquid is weatherstripping cement in a tube. The instructions cautioned about applying the glues over paints, and while the stuff in the tube does a great job of dissolving Rustoleum, the 3M aerosol had no impact on the paint. If you are concerned about lifting paint, spray a light tack coat first, and let dry before you shoot on heavier coats. First step is to mask off everything you don't want to be stuck with! Actually, the aerosol was rather well behaved and overspray was not much of a problem. I still masked the entire interior to avoid getting cement where it doesn't belong.
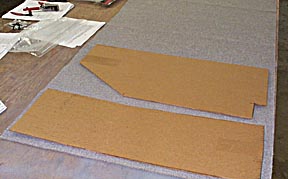
I made cardboard templates of the two panels that would receive fabric. As you can tell, the fabric was cut the correct width. Imagine that! Be sure you make two mirror sets of panels, and that you don't get confused with front/back of the fabric!
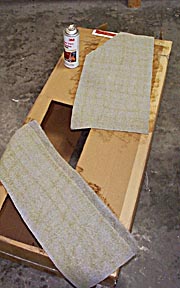
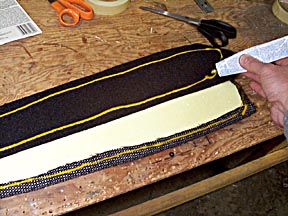
After shooting two or three coats of the Scotch 08090 cement on the sidewalls, I did the same on the back of the fabric panels (in spite of instructions on the can about not applying to fabrics). The panels were cut about an inch oversize all the way around to allow for trimming later. You let the cement dry, and when the panels hit the sidewall and are pressed together, the bonding begins. The 08090 allows some repositioning, but the weatherstrip cement does not!
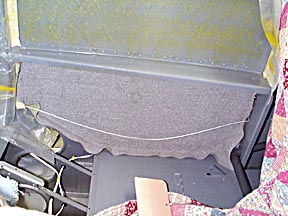
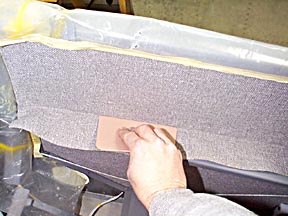
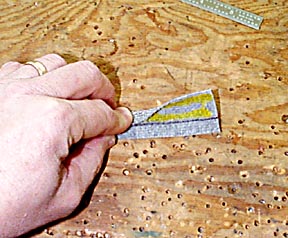
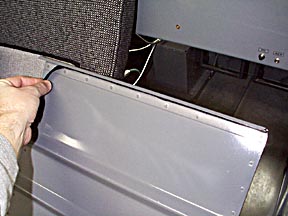
Ok, here we go. If you feel a strange lump behind the panel, it is just the rudder cable that you have now concealed behind the fabric.... Notice the oversize cut. The fabric will stick very nicely in place as you smooth it out.
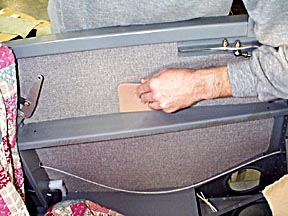
A squeegee is used to spread out the fabric and press it against the sidewall. You can also use it to force the fabric into corners. Don't get too crazy with the squeegee and distort the fabric so that the weave starts to run in crooked lines.
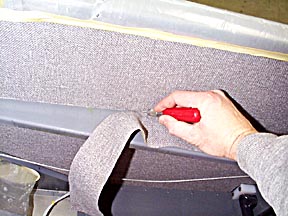
You will need a very sharp knife or razor blades to trim the fabric. I like to use an Exacto handle with a fresh blade.The fabric was cut along the corners and pushed into place with the squeegee. (Pay close attention to the guys installing your kitchen floor next time and you will see the techniques needed for upholstery work.)
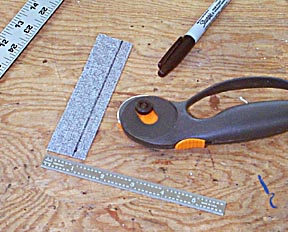
The edges of the fabric at the spar bulkhead are a little unfinished looking, so I decided to make some trim to finish the fabric edges.
Strips of fabric 1.375" wide were cut and a line was marked .375" from one edge on the back of the fabric.
Contact cement was applied as shown.
One edge were folded to give the fabric strip a finished edge.
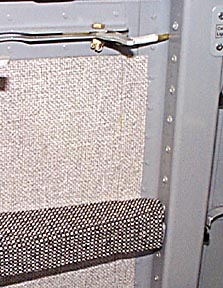
It is difficult to see in this photo, but when the fabric trim strip is glued in place, the unfinished fabric edge of the side panel is covered. This made a good transition to the bulkhead. There are many other ways you could use fabric scraps and cement to trim rough edges.
Remember: Weatherstripping cement only gives you ONE shot at getting everything properly placed!
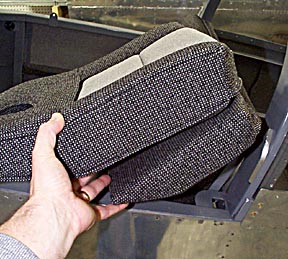
Put the armrests in place and wrap the fabric around and under the ledge. The fit of the armrest was uncanny, almost as if it was made just for an RV6....
The seatbacks are attached to the risers with a strip of velcro which I placed under the lip at the top of the seat. Slap the seatback into place and you are halfway there.
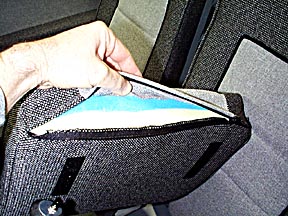
You may want to have D.J. install ConforFoam in the seat bottoms. This blue stuff pads the backsides of space shuttle pilots, truck drivers, and hospital patients. It is temperature sensitive and molds to fit your bucket as you warm to the task of flying your plane. It is hard when cold so may be uncomfortable in winter climes for the first few minutes of flight. I only have it in the pilot seat so the poor passenger will just have to suffer..ha!
Included with the RV6 seat set are booster cushions that fit beneath the seat bottom cushions. They velcro in place so can be quickly moved in or out as the pilot/passenger height dictates. I intend to fly without the booster but will probably use it in the passenger seat.
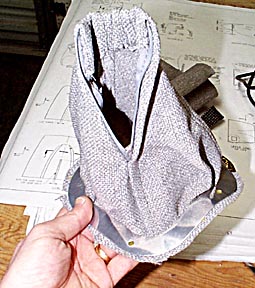
D.J. sent me a couple of cute little beanie caps made from the same fabric as the seat inserts. Wait, they look like they could also be used as stick boots! If you will/have installed grips on the control sticks, order the beanie caps with a zippers so you can slide them in place over the grip. I got a zippered boot for the pilot stick, and a regular boot for the passenger side since that stick will reside in a side pocket most of the time.
Included with the boots are aluminum "rings" which can be glued to the boots. Then the whole works is attached to the floor with screws. I glued the boots to the rings then trimmed around the rings with a very sharp pair of scissors.
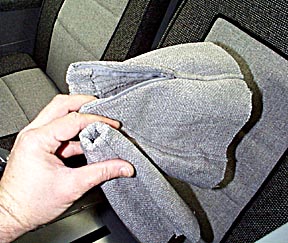
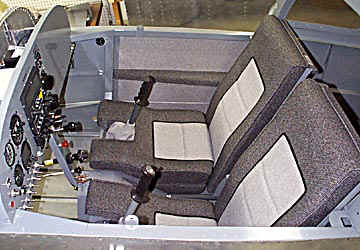
Cool, eh? You have to see these seats to really appreciate the quality of the workmanship. This is good stuff. By the way, they sure are comfortable in the shop. RV pilots tell me they feel good in the air as well.
Please submit all questions and comments to sbuc@hiwaay.net
|
Getting Ready to Build Building the Tail Building the Wings
|
|