Panel Page
Firewall Forward
Interior Installation
6/25/99; 4.5 hrs; buffing tail section.
It ain't over 'till its over...
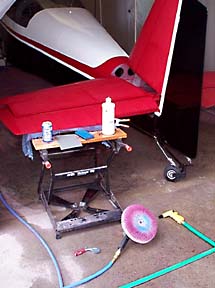
If you have bug legs, tree sap, and the occasional sag in the paint, there
is still hope. This photo shows the necessary implements to turn a mediocre paint job into
something approaching acceptable.
The first step is to carefully sand out imperfections with 1500 grit
wet-or-dry sandpaper using lots of water to keep the paper clean. Care must be taken when
sanding over rivets to prevent going through the paint. Auto finish shops will have
various sanding blocks that can used with the paper. Sanding should be done in straight
lines, not a circular motion. I sanded at a slow pace, with frequent washing and drying
cycles so I wouldn't take off too much paint. It is easy to sand orange peel down to a
smooth surface, just don't get in a hurry.
On the Workmate is a bottle of 3M Finesse-It II finishing compound. This
is a non-abrasive silicone-free liquid that will polish out the sanding marks when used
with a buffer. Next to the buffer is a little gadget, known as spurs, that is used to
frequently "fluff" up the polishing pad.
Also shown is a can of Lipton Brisk. This is poured into the buffer
operator at periodic intervals.
I was quite pleased at how the buffing process finishes the paint surface.
It is a lot of work, but most of the boo-boos are now history. The buffing process could
be continued until an absolute mirror finish is achieved or all the paint is gone. I
suspect I will just enjoy all I can stand then say "enough of this, lets take the
plane to the airport".
I haven't yet worked up the nerve to try buffing the black surfaces.
6/26/99; 2.5 hrs; more buffing.
6/27/99; 2.25 hrs; buffed rudder; installing pinstripe trim tape to paint
cut lines.
7/1/99; 2.0 hrs; installed more trim tape; installed elevator trim tab;
fabricated and installed inspection cover.
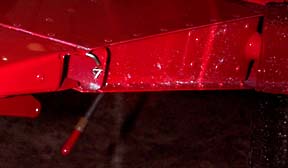
Here is how I secured the hinge pin for the trim tab; Simple and easy.
Pin was bent and secured with a short length of safety wire.
7/3/99; 8.0 hrs; prepped cowl, emp fairing (#*&@$%?!), wheel pants,
and spinner; sprayed epoxy primer on same.
7/5/99; 2.75 hrs; completed prepping of cowl and pants; sprayed black
paint on cowl and wheel pants.
7/7/99; 3.0 hrs; sprayed white on wheel pants, upper cowl, spinner, and
hardware.
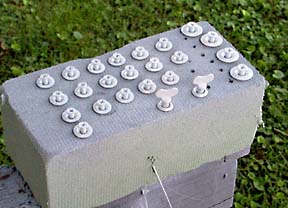
A block of floral foam holds the screws and washers for the spinner,
wheelpants, and oil door.
7/8/99; 5.5 hrs; painted emp fairing, trim on pants and cowl; hooked up
elevator trim tab; applied trim tape to wheelpants.
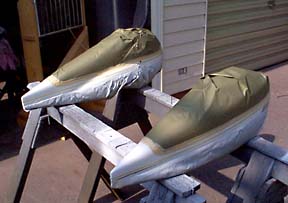
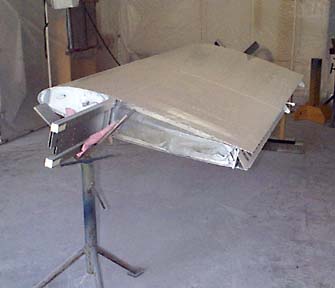
Wheel pants have had black sprayed on bottom half, then the black is
covered with paper and the top half is sprayed with white. This is followed by masking for
the red trim and covering the remainder of the white as shown.....
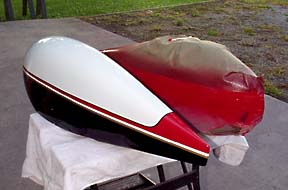
The ugly blob on the right is the pant after the red is applied. The
beautiful hatchling on the left is what we got when the paper was removed!
Probably not visible in the photo is the black trim tape on the top edge
of the red, and the gold tape at the edge of the black.
7/9/99; 4.25 hrs; installed emp fairing, installed gear leg fairings;
buffed top cowl and emp fairing.
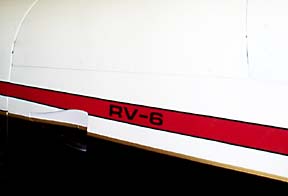
7/13/99; 1.5 hrs; detail work. Here is the 1/8" black trim tape
applied to the red borders, and the 1/4" gold tape separating the black and white
areas. The "RV-6" is computer cut vinyl from a sign shop.
7/14/99; 2.5 hrs; prepped and primed wingtips and root fairings.
Transported fuse to airport!
7/15/99; 2.5 hrs; painted wing tips and root fairings.
7/17/99; 3.0 hrs; buffed wing tips and installed AeroFlash nav
lights/strobes.
7/19/99; 4.5 hrs; built fixture to hold wing during painting; ScotchBrited
right wing and sprayed primer on wing.
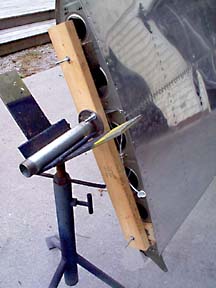
Pipe flange, 12" x 1.5" pipe nipple, and 2x4 scraps were used to
assemble a fixture that would rest in vee-blocks. The spar stub rests in a vee-block as
well. This allows the wing to be rotated as necessary during prepping/painting.
7/21/99; 2.0 hrs; sprayed white on right wing.
7/22/99; 3.0 hrs; painted leading edge of right wing; repainted wing root
fairings.
7/23/99; 2.5 hrs; prepped and primed left wing.
7/28/99; 2.5 hrs; painted white on left wing; painted inspection covers
and screws.
7/30/99; 4.5 hrs; completed painting left wing; dismantled paint booth.
Painting is complete!! Total time for painting...124.0
hrs.
Here is the rundown on the materials that I used for painting N399SB:
One gallon of epoxy primer (makes two gallons sprayable)
Two and 1/4 gallons of paint (this makes 4.5 gallons of sprayable material)
One gallon of degreaser
My objective was to apply as little paint as reasonably possible. After
all, any paint job is going to decrease the performance of the plane due to additional
weight. I don't know how much the paint job weighs since so much of the paint ends up on
the floor and in the back yard. The primer was applied very sparingly, just enough for
coverage.
(Note: I suspect the primer could be omitted with no adverse effects. I think the
color paint would stick just fine to a well-ScotchBrited and cleaned surface.)
The bottom of the wings, fuse, and horizontal stab received just one
medium coat of color. The remainder of the plane got two coats, the first light, and the
second medium. A close look at the rivets will indicate that there is not much paint on
this plane.....no invisible rivets on this plane! I am very pleased with the amount of
gloss that resulted from the PPG Concept system, and several compliments have already been
received.
The Concept paint sands and buffs very nicely which makes it a very
forgiving system for the novice painter. Obviously, the very dark colors are much more
challenging to finish than light colors, but I recommend this system to the RV builder who
doesn't want to fool with a two-stage system. Total cost of all painting materials came to
about $900.00.
Back to Paint, page two
Back to RV6 Home Page
Please submit all questions and comments to sbuc@hiwaay.net
|

