8/8/98; 4.0 hrs; fabricated inspection hole and cover in rear of fuse;
first trial fitup of vertical and horizontal stabilizers; installed additional J-stringer
to bottom of fuse; fabricated and drilled covers for F-604 bulkhead channels.
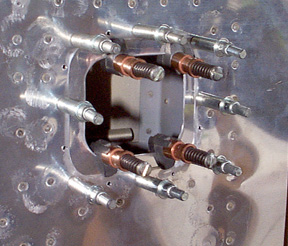
The inspection hole is for attaching the pushrod to the elevator horns and
tightening the vertical stab attach nuts. I can just get my hand through the hole
on a good day. I used the cutout from the large hole in the aft rear deck for the cover.
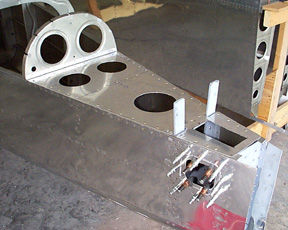
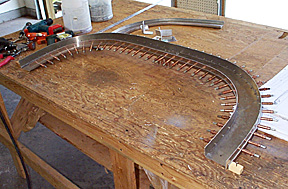
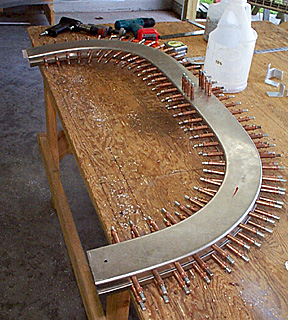
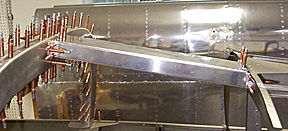
Here is the aft deck with the rear bulkhead for the top skin. Once this
deck is attached, the fuse is very stiff. The rear spar of the horiz stab bolts to the
bars protruding from the deck.
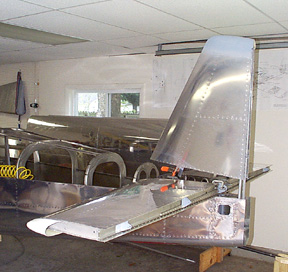
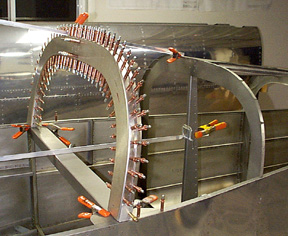
First trial fitup of the tail surfaces! This thing may turn out to be an
airplane after all....
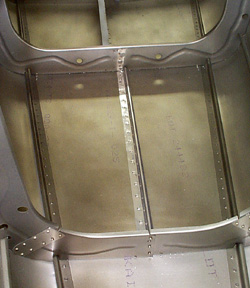
Considerable oil-canning was observed in one of the large bays of the fuse
bottom. A scrap J-stringer was just long enough to span the length of the bay and
eliminated the flexing of the skin. By the way, drain holes were drilled in the bottoms of
the bulkheads to allow water to easily flow to the rear of the fuse.
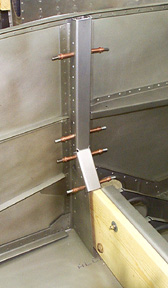
Caps (covers) are fabricated to enclose the F-604 channels. These will be
attached with pulled rivets. Wonder if the RV6 would fly very long with that 1x8 as a
spar......the J-3 does ok....
You will notice that the interior of the fuse has
been.....cough.....gag.....primed. This is not due to a fear of the fuse corroding before my eyes, but as a prep for the interior paint. It
didn't take much longer to prime the whole thing once the spray gun was fired up.
8/10/98; 4.25 hrs; constructing F-631 cabin frame.
8/11/98; 3.0 hrs; fabricated and drilled angles for F-631 to fuse and
channels.
Back to Fuse, page five
Forward to Fuse, page seven
Back to RV6 Home Page
Please submit all questions and comments to sbuc@hiwaay.net
|

