The RV Journal TruTrak AlTrak installation
|
 |
|||
The wing leveler has been a valuable asset in the panel of N399SB for four years and 500 flight hours. However, maintaining a precise altitude in the quick RV-6 for an extended period of time requires a great deal of attention to the altimeter and trim settings. Most RV pilots are probably just content to let the altitude wander a bit, but a few seconds studying a chart or fiddling with the GPS can allow the RV to lose or gain a couple of hundred feet rather quickly. Certificated two axis autopilots are occasionally installed in RVs, but the price is steep. One inexpensive altitude hold unit that uses the electric elevator trim for maintaining a set altitude has appeared, but it seems to be better suited to a slower, more docile plane than the RV. So it was with great interest that I followed the introduction of the AlTrak altitude hold system since I am in the process of updating the avionics in my plane to incorporate the new solid-state accelerometers now available at reasonable prices. The AlTrak has no moving parts in the programmer box and uses a combination of electronic gyro and pitot input to drive a stepping servo that is connected to the elevator control circuit. Personally, I have been a bit concerned about inserting a servo system in the elevator circuit of the RV because the control stick has rightly been called the "Wing Removal Lever"! A rapid, large, uncommanded movement of the stick could quickly overload the RV airframe due to the substantial cruise speed and authoritative controls of this design. At my prompting, one engineer at TruTrak was very forthcoming in discussing remote yet potential failure modes in the AlTrak, and I was convinced that it was extremely unlikely that in-flight problems would occur that would be a hazard to my well being, and that failure prevention had received high priority in the design phase of the AlTrak. The AlTrak altitude hold unit is produced by the TruTrak autopilot folks who have a long history of autopilot expertise at their disposal. When the servo is first hefted in hand, it is apparent that this is a heavy duty item that was designed for long life in high performance aircraft. Matter of fact, about the only gripe I have with the AlTrak installation in my plane is my chagrin at installing a 2+ pound servo two-thirds of the way down the aft end of the fuselage. The RV-6 already has an issue with aft CG, and the servo certainly doesn't help matters. Fortunately, I had already moved the ELT from the elevator bellcrank area to a location forward of the instrument panel, so I suppose the ELT/servo CG swap was almost a wash.
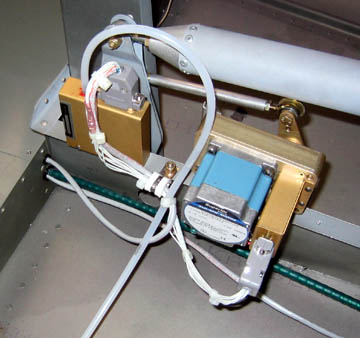
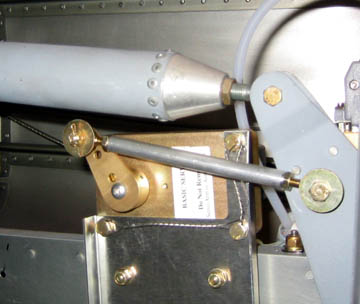
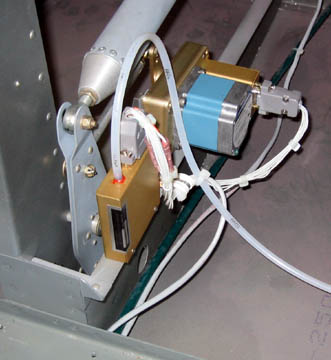
The AlTrak installation in the RV-6 is facilitated by a bracket supplied with the system which is specific to the RV. The installation consists of mounting the servo, rigging a pushrod from the servo to the elevator bellcrank, mounting a small programmer box, mounting a switch in the panel, and running wiring to connect the whole system together. No wiring was included with the kit, but D-sub connectors were in the box. The pushrod with two rod end bearings is included along with documentation that shows the dimensions for locating the pushrod and servo bracket.
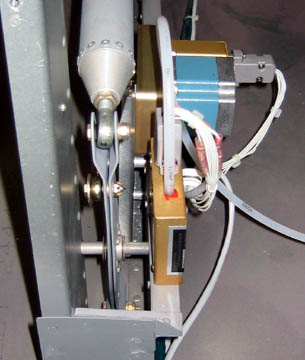
Due to the geometry of the bellcrank installation in my plane, I had to fabricate 1/4" spacers to locate the servo further to the right side of the plane so there would not be any interference between the servo pushrod and the elevator bellcrank at full travel. This may or may not be an issue in all installations, but it is an area that needs to be looked at very carefully when setting up the servo. Washers can also be used to shim the pushrod attachments in order to gain clearance.
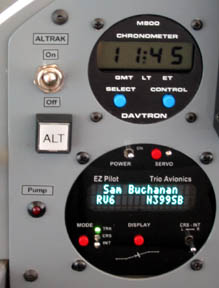
It is good construction practice to secure a rod end bearing with a large area washer. This is to prevent the possibility of the pushrod falling off the servo arm or bellcrank if the rod end bearing failed. A loose pushrod could conceivably jam the controls; the large washers should be provided in the kit along with instructions on their use since this is a potential safety issue. A bit of LockTite on the rod end bearing threads along with carefully tightening the lock nuts is also a good idea so the pushrod tube can't unscrew and leave it dangling in harm's way. To really secure the threaded pushrod, a small hole could be drilled in it so safety wire could be routed through it and around one of the rod end bearings. The other hardware omission is proper fasteners for the servo. A flight safety issue would arise if the servo came loose from the bracket. This scenario is easily prevented by using fasteners that can be safety wired such as AN3 bolts with drilled heads. Drilled 10-32 pan-head screws would also work nicely. Hopefully TruTrak will consider including the large washers and drilled servo fasteners with the AlTrak package along with documentation for their proper installation. The only addition necessary to your panel is a lighted pushbutton switch (labeled ALT) that activates the system. I added a toggle switch adjacent to the included ALT switch so I could kill power to the entire system when desired. After engine start and before taxi, the power switch is flipped, the lighted ALT switch flashes as the system initializes, and it is then ready for operation when you push the ALT switch. I make turning the system power off a part of the routine prior to entering the landing pattern.
Even though it is not necessary to plumb the static port on the programmer to airframe static in an unpressurized plane....I did it anyway. Some CAT-5 network cable I had on hand was used to run signal and power back to the programmer and servo; I used a pair of wires for each power and ground circuit. Shielded cable might be a better choice since I can hear a very low-level signal in the quiet Lightspeed headsets when the servo is actuated.
Early test flights have proven that the AlTrak system works precisely as advertised. In mild turbulence with the Navaid tracking via GPS, the AlTrak holds altitude within about twenty feet after the panel-mounted switch is pushed. If a shallow turn is initiated, slight altitude loss occurs since there is no roll coupling provided unless TruTrak's DigiTrak wing leveler is connected to the system. But the system brings the plane back up to the desired altitude in a brief period of time, and this is not an issue on cross country trips because large heading changes aren't required. The servo is disengaged by pushing the panel switch which removes power to the servo. It is possible to easily overpower the servo if necessary and I was told there is a shear mechanism built into the servo in the very unlikely case that things really got out of hand. I notice a slight amount of drag in the elevator controls on the ground, but not once flight loads are present. Operation of the servo is transparent; I can barely detect stick movement and see the nose rise or fall in tiny increments when large adjustments are being made. The sensitivity of the system seems just right with the default setting from the factory.
To test the usefulness of the AlTrak in a semi-emergency situation, I hit the ALT switch while in climbs and shallow dives to see how the system would react. I was pleased to see that it would arrest the climb or descent and return to the altitude the plane was flying when the switch was hit. There is no doubt the AlTrak assists with workload when you don't want to concentrate on holding altitude or need to turn your attention to other matters. I also see it as a safety feature for those tense times when something unexpected happens and our resources really need to be directed to urgent tasks. The AlTrak system appears to be designed and constructed with reliable service intended, and I look forward to enjoying my unit for many hours to come. Highly recommended!
Return to The RV Journal front page
Please submit all questions and comments to sbuc@hiwaay.net
|
Getting Ready to Build Building the Tail Building the Wings The Finish Kit
|
|