Paul's JAE 45 build
12 July 2010 JAE 45 started many thanks to David Hall for cutting, and building some of the boat for me as I have been pressed for time to build here lately. This is my first build in over 28 years, but I can say the JAE is pretty easy to build. For those out there that do not have a great deal of building experience under your belt I would suggest a JAE 12 or 21 would be a very good starting point. (Or the JAE 21 FE electric kit) All of the JAE kits are available at Zipp Kits.
Current plans for this boat are to use a AA 45 motor, AA pipe, Futaba radio, West epoxy, Zap CA glues/kickers, Walt Barney tank, Speedmaster hardware, KlassKote Epoxy paints.
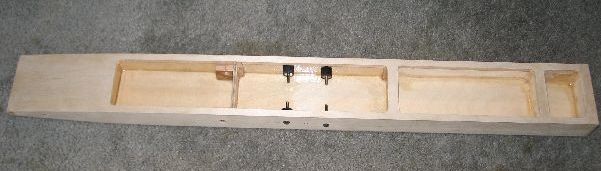

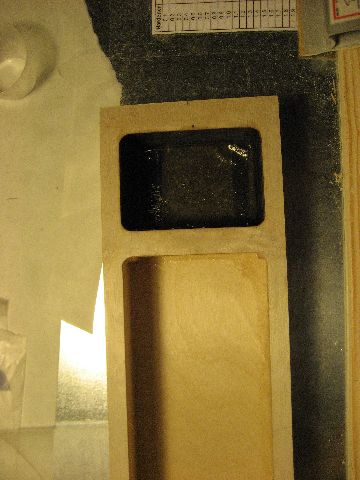
Starting point for tub (Thanks to David Hall for getting the ball rolling on this!)
Side view of front sponson, both side sheets have been applied at this point.
Top view of front sponson, sheeting on sides only at this point.

Doing some sheeting, need a FLAT building surface and some weights for this. Wax paper under the sheeting will save you a great deal of time if you have some epoxy seep out. I used epoxy for all the sheeting on the Rt. sponson. (West 105/205 "fast" cure, this gives you about 20-30 minutes of working time before the initial set.) The left sponson I used epoxy for some and CA+ and kicker method also. The CA+ and kicker will really pick up the build speed! But by the same token you have to work faster as the kicker will give you about 5-10 seconds of "adjustment" time. You WILL glue your fingers to the sponson if you go the CA+/kicker method! You MAY have to use foam safe CA and kicker also, it depends on the type of foam you use. (Spyder or "blue foam" needs foam safe CA, Divinycell foam does not require foam safe CA glues.) The CA method calls for putting the glue on the foam side and spray the kicker on the wood, then press the two together and make any adjustments QUICKLY as you only have 5-10 seconds of work time, MAYBE LESS!!! For smaller sheets this method is fine, for larger sheets you have better work fast or just go with the epoxy method. Either method will produce about the same strength to weight ratio so it will be your call on this one.
My building surface is a inside door (hollow core) that has a thin sheet metal bonded to the top surface. The door/metal is then placed on top of a standard 6' table. This surface is flat, pretty big and you can use magnets to hold things in place while the glue set up. This kind of building surface is used a great deal in the RC airplane world. If you are a careful shopper you can pickup one of these doors at you home centers for $25-$50 and the sheet metal top (optional) is only a few more bucks. (Ask for damaged doors as they do have them with damage on a side or edge that will not affect them in this use.) I used a contact glue to bond the sheet metal to the door surface. You can use some shelf stock for a building surface, cheap and with proper selection pretty flat also.

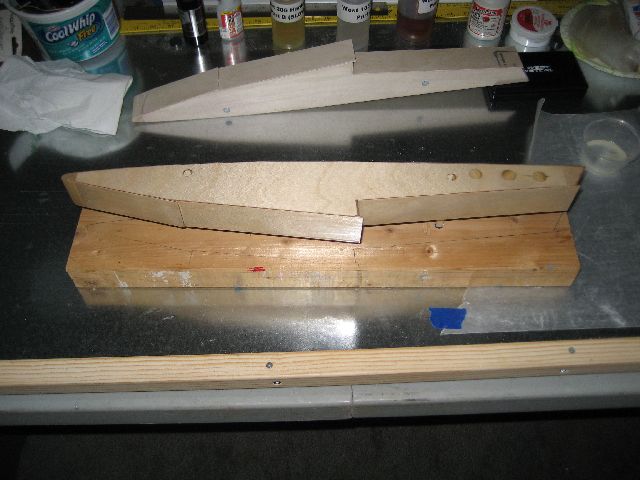
One sponson sanded and ready for sealing, the nose block on the other one is due for a trip to the sanding room. (Outside!) Note overhangs on rear edges of sponsons, a bit over 1/16" but some final sanding will bring these down to 1/16". The 1/16" is not 100% critical, some overhang is really all that is required.
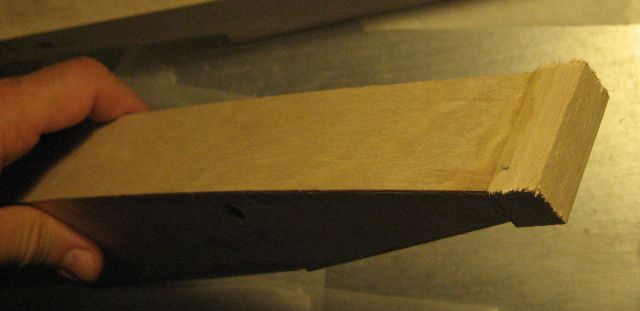
Before sanding the nose block.
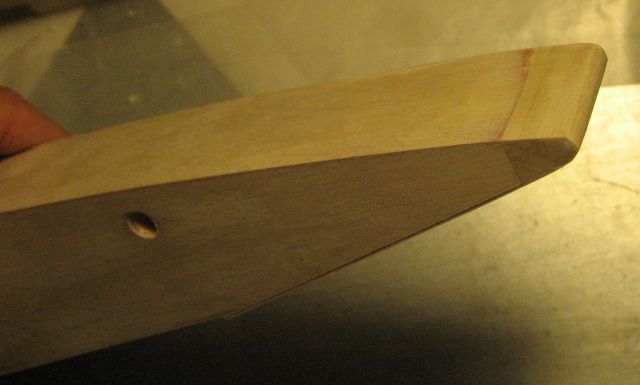
After sanding nose block. I used a hard wood (Poplar) for this nose block.
Front sponsons sanded and ready for first sealing coat of West epoxy. (I used 2x4 wood jig to hold sponson while brushing the epoxy on and drying.) After the epoxy has set I used a razor blade (single edge please!) and "scraped" the surface. Keep the razor blade at right angles to the surface, this method will keep sharp/square edges where sanding will "round out" some of these edges. Straight/sharp edges is what the JAE design is all about.
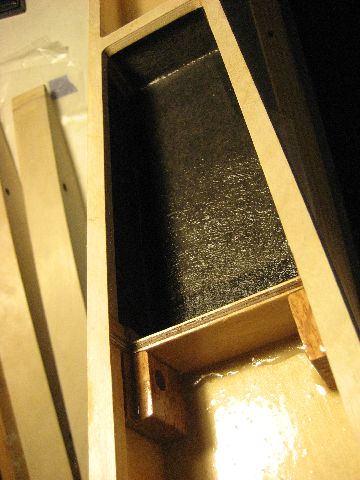
I applied a 0.5oz/yard carbon "tissue" and epoxy inside the tub to make the bottom plate a bit stronger, this adds nearly no extra weight as you need to use epoxy to seal the tub anyway. The carbon tissue is VERY easy to work with and will drape over most curves and hold well.
I did the same carbon tissue in the transom area also, and I added a carbon fiber plate (1.5mm) bonded to the (inside) transom for extra strength. This is over kill I'm sure but again the added weight is not an issue for this application.
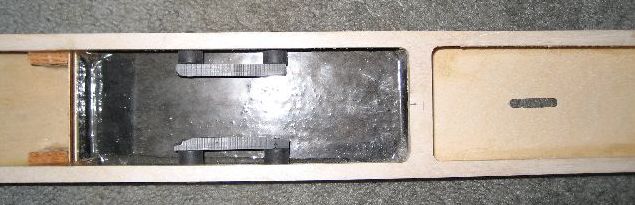
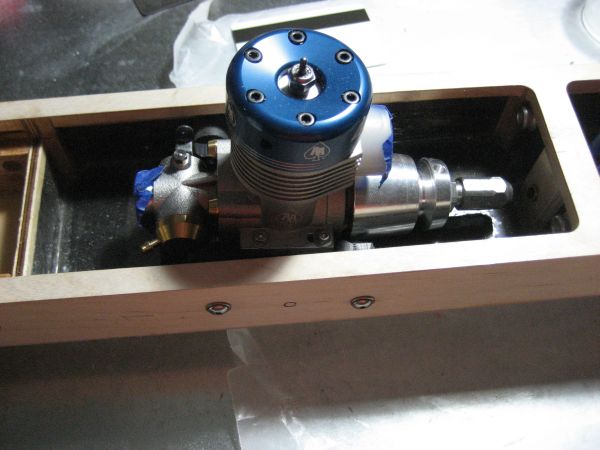
Motor mounts installed (AA 45 motor) I used 5/16" delrin square stock and some vibration isolators (8/32" bolts). Note the mount has not been drilled for the motor at this point. There is a small clearance required for the AA 45 carb. and fuel inlet (lower left side in picture), more sanding and smoothing of the mount is the next step. The stuffing tube/motor will be mounted up next.
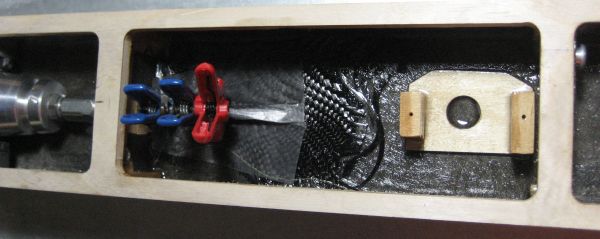
The stuffing tube and rudder servo are mounted now. I used the same method as above, some carbon fiber tissue all around the radio box, and then some heavy duty (5.6 Oz/Yrd) CF to reinforce the stuffing tube. In the upper right corner you can see the pushrod seal, it is a aluminum holder that the rubber like bellow attaches to. These are VERY well made seals.
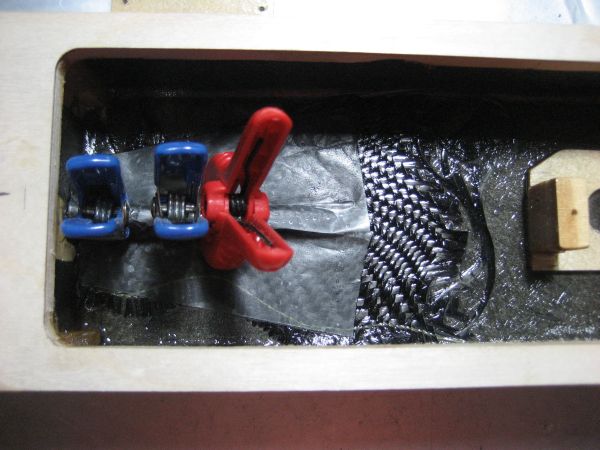
I used some wax paper over the top of the CF, and some clamps to hold it in place until the epoxy sets. I was planning to use either hairspray of 3M 77 spray on contact glue to hold the CF in place and then epoxy over it. In the end I just coated the CF as it was folded and held its shape with no holding. (The CF tissue is great stuff to work with, the heavy CF cloth is more of a pain to use.)
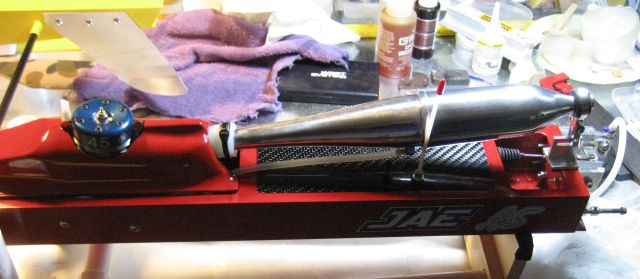
AA 45 mounted up, stuffing tube in place now also. Need some plumbing work and linkages for throttle and 3rd channel needle mixture. She is coming together!


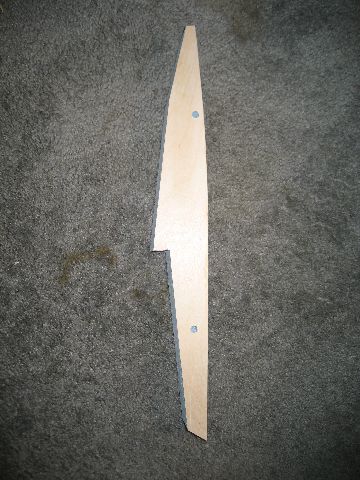
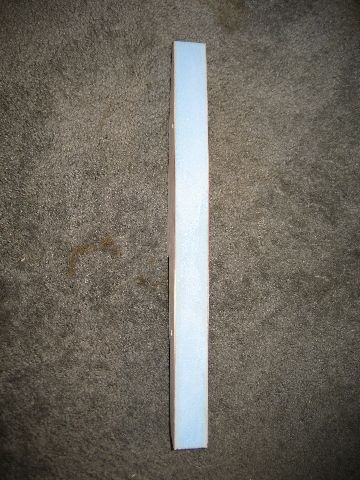
The initial ski build, foam/ply sides and top here.
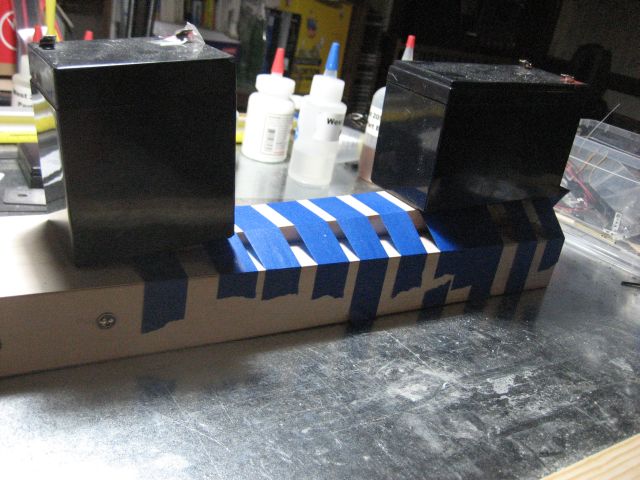
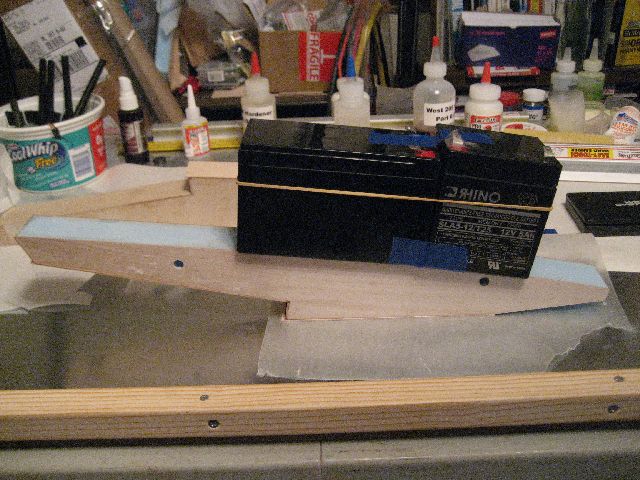
The stuffing tube and ski are attached now, lots of tape and weights to hold it in place. The ski has foam/ply construction and the some of the foam was removed so the stuffing tube would pass through the ski. On the end of the ski (by the prop) is a end cap of 1/16" ply. The inside of the ski has been sealed (West epoxy) along with the foam as this area can/will see water.

Finished up ski and one coat of West epoxy as a sealer has been applied to the tub now. The top side has not been sealed just yet, I will finish the radio install and the cowl before I seal up the top side.
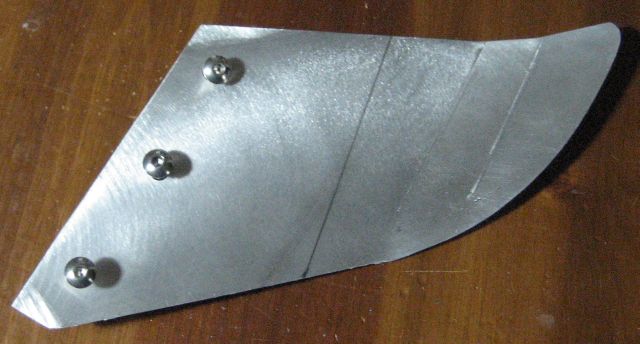
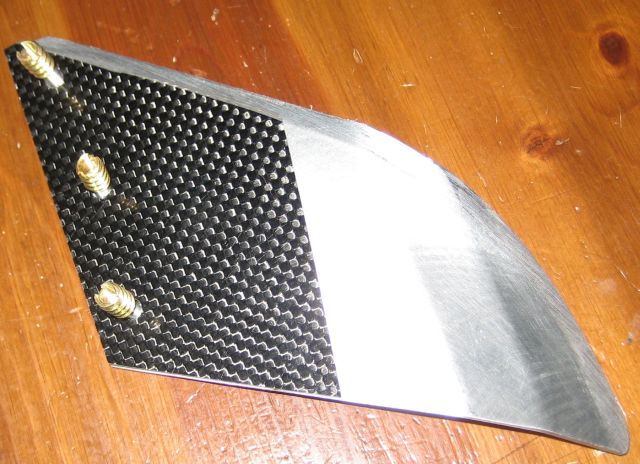
I have finished the turn fin now also, as you can see with the JAE the mounting point for the turn fin is well above the water (~1.5") and with the great turning of the JAE design this puts a great deal of load on the turn fin. Good strong aluminum (6060 T6 at least) or 7075 T6 would be in order here. This turn fin is from Mike Hughes, it is very well made and pretty strong (7075 T6 aluminium), however I added some extra support/strength to the turn fin with the carbon fiber backing plate. (You can bond the CF to the fin, but the loads in turning will "push" the aluminum against the CF and reinforce the turn fin.) Make note the threaded brass inserts in the picture are not used, but rather a threaded aluminum hex standoff (1.5" long) and roughed up on the outside is bonded inside the sponson. I will have a picture of this posted soon. The turn fin is very strong and will not bend under the turning loads. Oh and yes it is very sharp also!

Here is a picture of the Rt sponson and the hardwood dowels for mounting the turn fin. These dowels pass all the way through the sponson and are epoxied in place. The aluminum standoffs are not installed at this time.
26 Sept 2010 Update, ready for paint!
Ok its been several weeks since I could work on the JAE, this got to make a living is getting in the way of boat building! I finished up the hardware install and tub sealing/sanding so after what felt like forever I was ready for paint. First off I have not painted (ok did some house painting) in nearly 30 years, and then I did it outside no less! Bugs, dust, and other problems are all part of the outside painting deal, however I do recall some of my paint jobs came out pretty good. Well I guess in my old age (wiser perhaps?) I know the importance of using the correct tools for the job, and taking your time on the prep work BEFORE even opening a can of paint. I had planned to use KlassKote epoxy paint on this boat, but the big problem area is where to paint and what other tools will I need. After careful review of my options, I selected a path that should give me the best results with a modest amount of work and a middle of the road cost. (I do not need to have a mirror finish on a race boat, after all if it is too nice you will not run it hard like a race boat SHOULD be run!) I am looking for a ~95% defect free finish, good shine, durable, somewhat easy to use system and without a doubt nitro fuel-proof.
The tools for the paint work:
-
Paint gun, HVLP variety, 1.1mm tip detail sprayer, Harbor Freight ~$30 (soon to be replaced with a "better" gun)
-
Air compressor (shop item on hand) 5.5CFM @ 90 PSI, 4 Gal tank
-
Filter/water/oil separator along with gun mounted air regulator
-
Paint booth (built from 1" PVC frame and 4mil clear plastic sheeting) ~ $75 in materials
-
Personal safety gear, REQUIRED!!! 3M mask, Tyvek suit, gloves, goggles. DO NOT EVEN THINK ABOUT PAINTING WITHOUT A RESISPERATOR!!!!
The paint booth was constructed from 1" PVC pipe and 4 mil plastic sheeting (I went with the 4 mil stuff, Lowes or Home Depot has this in the concrete area it is used in ground cover under slabs, or crawl spaces and is very tuff) A roll was 10' x 25' long, for under $12. I used a 10' x 12' sheet of 2 mil for the top of the paint booth as this was cheap, and easy to use along with allowing more outside light into the area. I made my booth about 7' high, 8' long and 4' deep, this SOUNDS like a big area but once you get a model in there with you and slinging some paint it can be a bit tight. I used a 21" box fan (Wally world ~$15) along with some 20" furnace filters to bring in "filtered" air from outside the paint booth through it and exit another furnace filter the other side. The cross draft was along the bottom of the booth, and would draw the overspray "mist" away from the model being painted. To save the garage floor I put down a paint tarp, this is a sheet of some kind of absorbent material with a plastic backer bonded to it, the logic is any spilled paint would be held in the material and not pass through it to the floor. This was 12' x 12' sheet, and ran about $9 at Lowes. I would suggest putting the fan higher up so it would create more air flow inside the booth, remove more overspray and provide a bit more airflow on YOU to help control your temperature. I will say the HVLP gun does not produce as much overspray as the older spray guns I used long ago, however the gun did require a fair amount of air to shoot also. I think it required 4.0 CFM @ 50 PSI so your pancake compressor will be hard pressed to do this. I used a Hitachi "portable" compressor, by portable I mean 2 guys can lug it around, one guy can drag it around maybe. It is a oil type compressor with 4 gallon tank, and a 1.6 HP electric motor, it is about the biggest "portable" compressor I've seen that could be called a portable. It did handle the spray gun but it did cycle on/off more than I was expecting also.
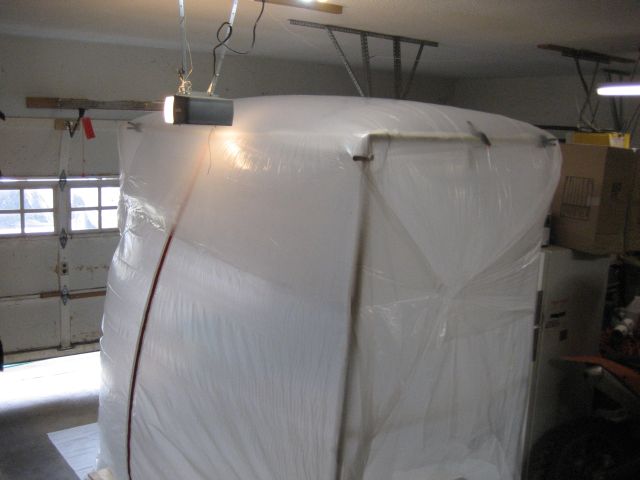
Here is the finished paint booth, sorry I could not get a full view here as the garage space did not allow me to get it in full frame. The fan is on low here and you can see the sides "balloon" out from the small air pressure difference between the inside and outside of the booth. Note the plastic is NOT attached to the frame, but rather clamped to it, and the frame is not glued together side to side so when I'm finished painting I can remove the plastic, and break down the frame for storage. The red line in the front middle is a really cool zipper deal, it is basically a zipper with a sticky peel tape to bond to the plastic, then cut it between the zippers and now you have a door in/out of the booth. (The zipper is a item for sheet rock work to keep control of the sanding dust.)
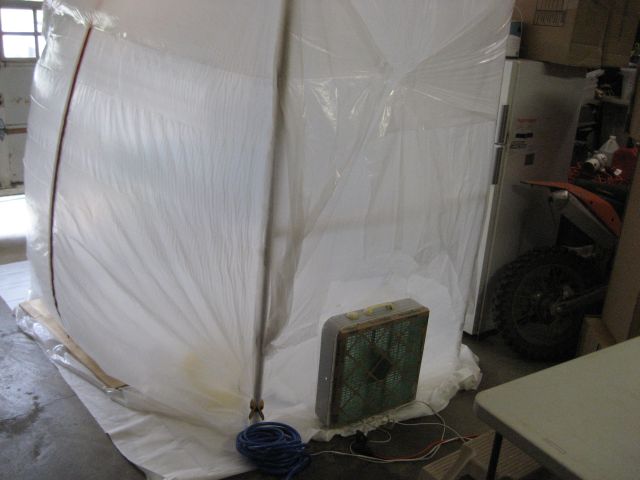
Here is a shot of the filter and box fan, I only used clear tape to mount the filter to the fan, and the complete assembly was taped to the plastic.
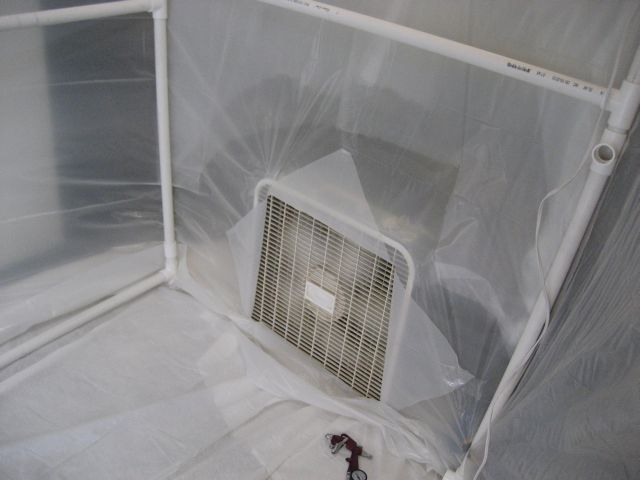
The inside of the booth view of the fan. In the lower right you can see the paint gun I used, the paint cup is not mounted at this point, it is a 4 oz cup.
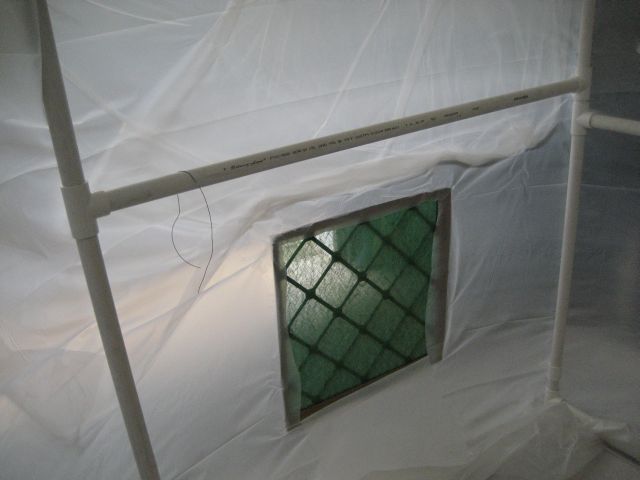
The exit filter, this keeps the overspray from going all over the place outside the paint booth. I used cheap furnace filters, 4 for ~$3 items, would suggest a better inlet air filter may be worth while, if you go to this much trouble why not make sure NO dust gets in. The exit filter will need to be replaced more often then the intake side, also note more overspray will clog this filter sooner. I figure at least one boat painting per exit filter, and if you really want to keep overspray from getting out either a better filter or just double the cheap ones up.
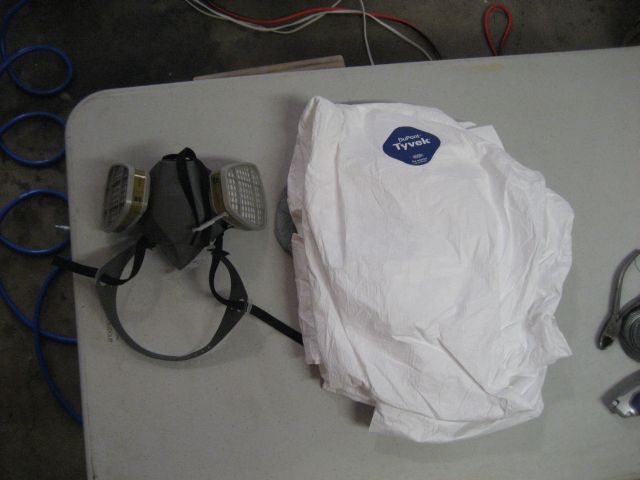
Personal safety gear, get the good stuff as you only have one pair of lungs, and you will need them to work if you want to stay alive! Missing from the photo are the goggles (keep overspray out of your eyes please), gloves, and baseball type cap. The 3M respirator used has changeable filters so you can fine tune your filter needs for the task as hand. The filters used for painting are a carbon material used for organic/inorganic vapors. PLEASE USE THE CORRECT FILTERS FOR THE JOB! The Tyvek suit (available at Lowes, $10) has a hood and "feeties" but no built in gloves. I wore a baseball type cap as the suit hood would slide down near my eyes and require adjustment, but the goggles really held the hood in place better. I used some motorcycle goggles as they sealed well, breath, and I happen to have several pairs in house! This suit will breath SOME, but on a hot day inside the booth you WILL get hot. I wore shorts and a t-shirt inside the suit and did get a bit warm during the spray time. (about 80 deg F the day I sprayed paint) Would have liked the suit to have a bit more arm length as the small gap between the gloves and suit did make for a interesting "wrist watch tan". ;-)
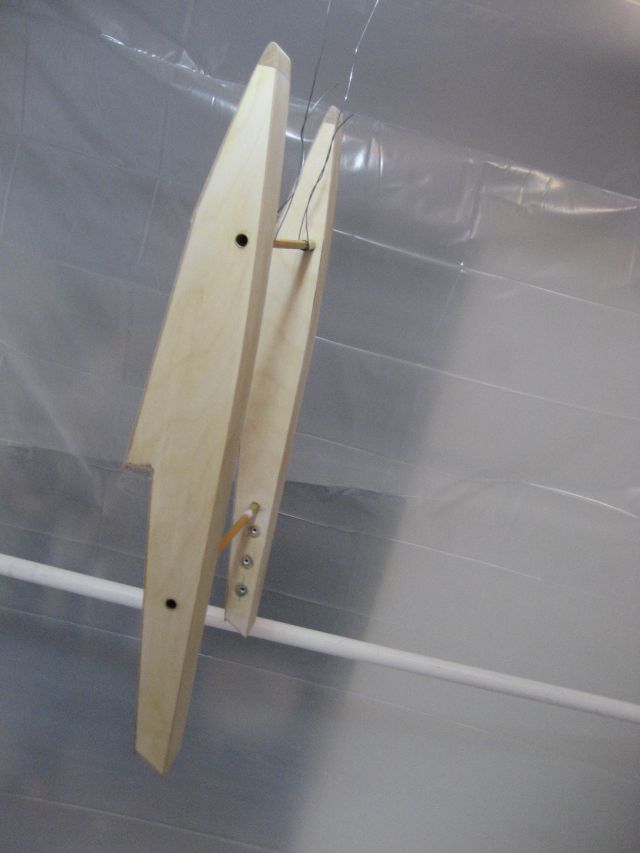
Sponsons hanging ready to shoot paint to them! The paint booth frame has a center bar to hang items from (or lights as needed), I used wire and some dowels to hold the work while I painted. I did not like this approach as it allowed the items to move as the sprayer hit them, sort of like a duck shooting game! I would rather have the items on a base held firmly in place and maybe allow rotation for hitting all the hard to get to locations. The to paint items had a pre-paint wipe with a tack cloth (Lowes ~$2) and a wipe down with lacquer thinner to remove any foreign material before shooting the paint. You want the surface to be painted as clean as possible to start with. Remember all that prep work, sealing, sanding, and more sanding will make or break the finial finish!
I mixed up the paint as per the instructions using a 1:1 ratio of A & B, mixed and allowed to set 30 minutes (stirring every few minutes) then adding in 1 part reducer (again KlassKote) to thin the paint for shooting. I used some glass jars for mixing as they clean up easy and you can see what is going on in them as well. I did not strain the paint as I filled the spray gun however I think that would be a good idea just in case you have a clump in the paint. I think a coffee filter would be too fine for this, may have to purchase actual paint mesh filters.
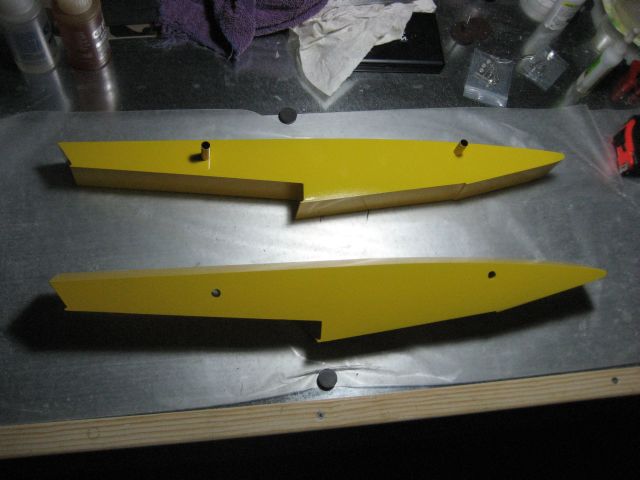
Here are the sponsons, screaming yellow no less!

This is the cowl for the JAE, it is ABS plastic
and available from David
Preusse, fits well, is easy to work with, should be durable. I
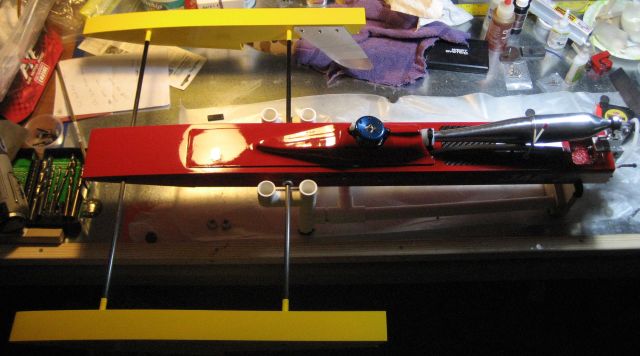
went with a yellow and fire engine red color scheme for the boat.
Version 2.0 of the paint booth will have better lighting (lights on each side so I can see any side of the model), better item holding, and higher quality inlet filter. These are only upgrades and not 100% required I'd say.
Clean up:
The paint booth and be broken down and stored for later use, the plastic should be rolled up to keep any dry paint form making a mess but all in all the paint booth was a great tool! You do want to keep dust off of the inside of the plastic sheeting, as this will get on the model while you are painting the next one. With some careful planning, a bit of work you CAN paint your boat in your garage.
Well she is ALMOST finished up now! Stay tuned as the first trip to the lake is planned for this weekend... first boat I built in almost 30 years... I hope I did not forget anything!
4 Oct 2010
Well after what felt like years... ok it has been years since I took a new boat to the water for the first test. Well after one more quick once over I poured the fuel in to the tank, blow out the motor, and switched on the radio. A quick test of the servos and I put the glow drive to her and hit the starter. Man that new AA45 is tight at TDC, have to really pull to get it past that point and keep her spinning. The motor fires up, WAY too rich so I turn the needle in some and do over. After a short while I have her running, WAY rich still but I figure with a new motor and all get some time on the motor and I can lean her down more later. I had the honor of having one of the JAE design team on hand and even did the honor of doing the first boat launch for me! Thanks David, I know you will always be the "proud parent" when ever a JAE is run! A few laps around the pond and bring her in to check her over and she was WAY too rich also. (There was a report of an oil slick spotted on the pond, but I think BP was trying to get some heat off of them!)
A careful check over and all looked to be fine, I prepped her for another run and helped a few other boaters with some runs. Another try and this time I leaned the motor down more (still very rich) and made several more passes, all looked good and the handling was spot on. (Ok I was not at anything close to race speeds yet.) The motor died out in the water and it took several minutes to go retrieve the boat as others had the water. After a bit of sit time I was ready for another trip to the pond, switched on the radio and the rudder servo was "chattering" a bit, now I know that is not a good thing so I figured I had better look into this before I do another run. I opened up the radio box and saw water, like 1-2 oz of it no less! Well after some time, and the old blow into the antenna tube and look for bubbles I found 4 places the water could get in! Two where the seal area, more like the seal holder that gets bonded to the boat and then the rubber boot goes over this mount. I sealed these real good, well I thought I did anyway, so some CA glue and kicker and these are sealed up tight. Now the two other spots turned out to be a strange place, more or less it was the top deck and aft bulkhead that had a leak, and the JAE dead in the water has the rear end under water, this put the water in the radio box. Once again CA glue worked fine and I was ready to test more.
Another launch, and I must say the boat "jumps" out of the water and is up on plane ready for action almost immediately after launch! (Another JAE feature that makes these boats just plain work!) Several laps still way rich, and as I come in I do not have throttle control, it is near idle but will not shut down or speed up, I circle the wagons and she dies after a few spins. The radio worked so perhaps linkage issues. Closer inspection revealed the carb. throttle barrel was loose so the linkage would not move the barrel. I bit of a pain to tighten this but I wanted another test or two this day.
One more test, this time the boat acted lean, I did lean the needle a bit from the last run but did not think it was that much, no matter a small twist richer and another try, this time she went about a lap and died, lean??? Ok I start looking for fuel connections, sure enough the 3rd channel remote base needle holder was a bit loose. One more run and she was starting to get some speed now, wanted one more tank of fuel run through her and then start leaning her in. Lost throttle again, same problem I need Loctite on that bolt. I had to call it quits at the point, as I had to be home early this time.
All in all it was a pretty good first day out boat test, some minor troubles and a few fixes and she will be ready for the next water date!