Sam Buchanan's Wee Lassie Project
Sam's Wee Lassie Log, page one
Sam's Wee Lassie Log, page two
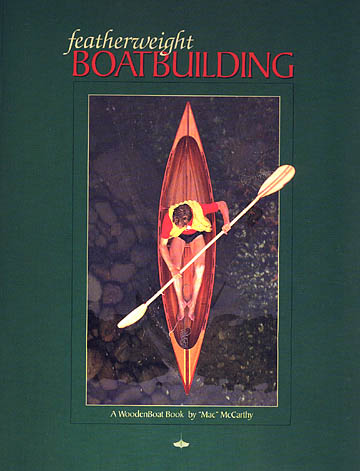
When it isn't practical to be on the water, I enjoy a good canoe read. A beautifully written tome on a delightful little boat is Mac McCarthy's Featherweight Boatbuilding. Mac took the 1893 J. Henry Rushton design, Wee Lassie, updated the hull, and compiled a comprehensive guide to building these little canoes. Here is how to contact Mac:
Mac McCarthy
1704 Andrea Place
Sarasota, FL 34235
(941) 355-6736 Shop
(941) 953-7660 Home
Here is the book info: ISBN 0-937822-39-6; available on Mac's website or quality bookstores.
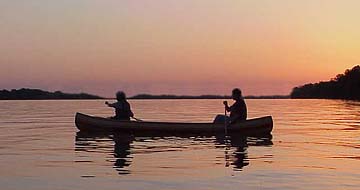
The Wee Lassie is a small, solo, double-paddle cedar strip canoe. The hull has a slight arch and minimal rocker. Since you sit in the bottom of the hull, the boat possesses good stability. The standard Wee Lassie has a length of 11'6" and a beam of 27".
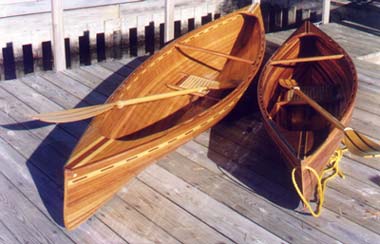
(photo courtesy Feather Canoes)
My reason for wanting to build a Wee Lassie is that the little jewel is really.......neat! The thought of a 30 lb. canoe that could be readily cartopped on an impulse and easily paddled down quiet streams really appeals to me. Since I have already built a 17.5' Laker, the petite little Wee Lassie seems like a small project that will yield a great cost/benefit ratio. The diminutive size means there are no major expenditures for wood and epoxy, and the project can be completed in just a portion of my crowded shop.
7/31/02
Mac would probably cringe at the liberties I plan to take with his boat, but I am building to put the canoe in the water, not to create a fine piece of furniture. While the book details the correct way to build the Wee Lassie, I intend to incorporate some of Gil Gilpatrick's methods to accelerate the building process. The internal and external stems are going to be eliminated since I am convinced that the stem construction on my Laker, while not very elegant, is certainly strong enough for vigorous use.
There is also the "bubba factor". I am 6'1" and about 50 lbs beyond the 150 lb ideal pilot weight of the standard Wee Lassie. McCarthy includes plans for the Wee Lassie Two (a version that is 13'6"), but I like the lines of the standard Wee Lassie better. In order to provide a bit more room and capacity, I have increased the width of the molds by 1.5", and stretched the length of the canoe 6" to 12' by adding one inch between each mold. This should not distort the beautiful lines of the 'Lassie but provide a bit more room.
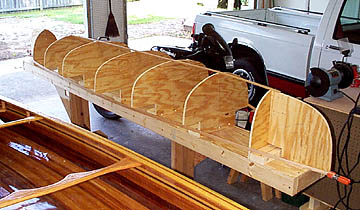
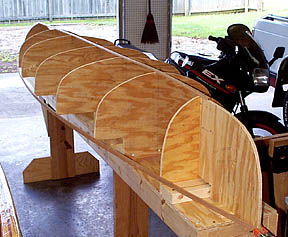
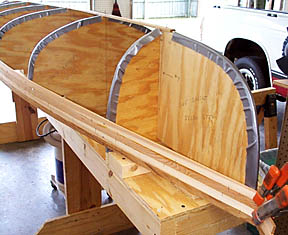
The patterns are included in the book. I found some cool poster board in the nautical design department of WalMart that has 0.5" grids. The dimensions in the book were quickly transferred to the poster board on my highly specialized drafting apparatus (sometimes called a dining table), the patterns were cut out and transferred to 1/2" CD plywood. A 18x96" strip of plywood remained after the patterns were cut out with a saber saw, and that strip was used on the strongback. The strongback is simply two 11' 2x4's and a few 9" 2x4 crossmembers. Legs built from 2x8's fit into "slots" on the bottom of the strongback and are braced with scraps of plywood.
Since I am eliminating the internal and external stems, the stem molds were modified so the strips would fair correctly on the bow and stern.
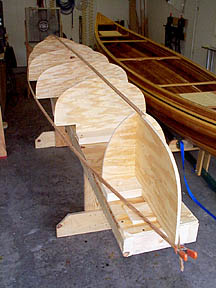
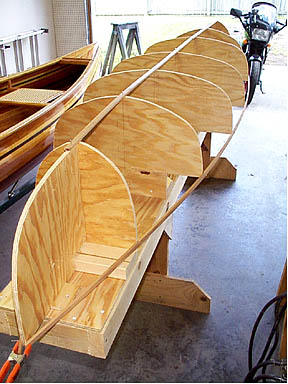
I like to run some scrap strips just to check out the molds to make sure I didn't mess something up in the process of transferring the dimensions. Everything looks great with only some very slight tweaking required.
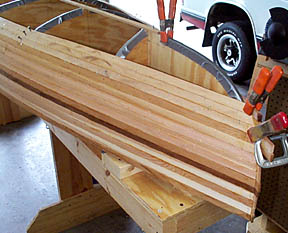
Next step is to cruise the local building supply stores for suitable cedar. Only four 1x8x12' boards will be needed to strip this little puppy!
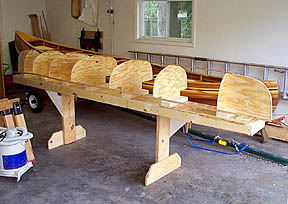
Stripping has begun! Before the first strips were attached, the forms were covered with duct tape to prevent the molds from becoming a permanent part of the hull.
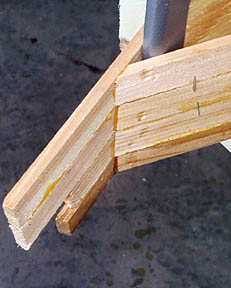
Here is a detail of the "stemless" stem construction. Not nearly as elegant as an internal and external stem, but easy to construct and very strong once fiberglassed. The strips will be trimmed and faired to form a nice radius at the stems.
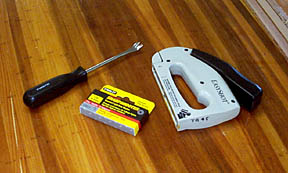
While purchasing cedar boards at a local builders supply store, I picked up this little "tack lifter". Once I ground down the tip to a near-knife edge, it became a nifty staple puller.
I also picked up a lightweight stapler that uses 1/4" TR45 wire staples. These staples easily penetrate the soft cedar and leave very small holes.
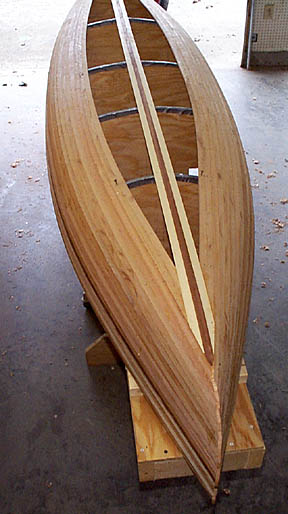
This is beginning to look like a Wee Lassie! Be sure you reserve some soft strips for the waterline because of the need to twist some of the strips toward the stems.
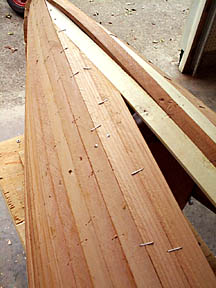
Here you can see how the strips attach at the stems. The strip on one side is allowed to run long, and the opposing strip is beveled to fit tightly against it. There are a few strips near the water line that require quite a bit of persuasion to fit properly at the bow and stern due to the twist required by the profile of the hull. I had to use some drywall screws (yech!) to hold these strips against forms #2 and #6; these holes can be easily filled later, however.
The feature strip of dark cedar is clearly visible in this photo. I had intentions of doing something really fancy with a feature strip...........but didn't.......
The end of the stripping is in sight! The keel feature strip (dark cedar and aspen) is in place and the football is in the process of being filled.
The bottom strips are beveled to fit the acute angle formed by the side strips and the keel strips. A benchtop belt sander is invaluable for tweaking the fit of these strips.
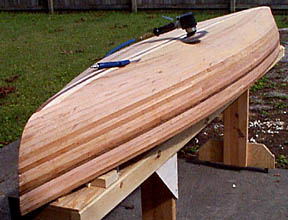
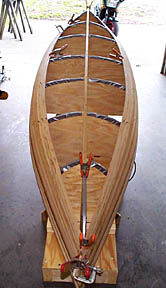
The stripping is complete! Shown is the air-driven orbital sander with 60-grip paper that was used to fair the strips.
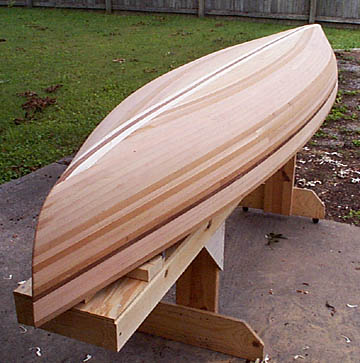
And here is the completed hull. I still need to fill the nail holes and do some other minor touch-up, but basically we are ready to move to the epoxy phase of construction. Note the castors I put on one leg of the strongback so it could be easily moved out of the shop while sanding the hull. I learned with the Laker that you can really make a mess of the shop if the sanding is done inside......lots of dust!
The stemless bow and stern worked out nicely as expected.
Time to order epoxy!