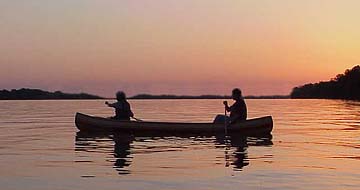
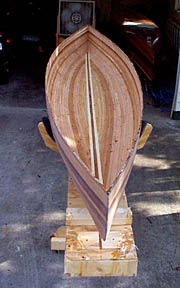
Sam Buchanan's Wee Lassie Project
Sam's Wee Lassie Log, page two
The outside of the hull was fiberglassed using the same materials and techniques detailed in the Laker construction log.
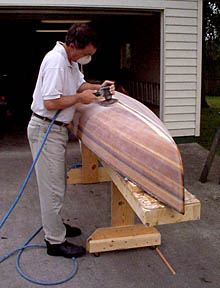
Following the application of the cloth and four coats of resin, the hull was sanded with an orbital sander with 60-grit paper.
I use an air-driven sander just because I have the shop plumbed for air. A heavy duty sander is necessary; the lightweight orbital finish sanders just don't cut the resin fast enough to be practical. It is a shame to sand the beautiful gloss from the epoxy resin, but unsanded resin has a lot of ridges and even a few sags that must be removed before the hull is ready for varnish. When all the shiny spots on the hull are gone, it is ready for the final step of varnishing. I made one trip around the hull with a palm sander and 150-grit paper just to remove the roughness left by the 60-grit.
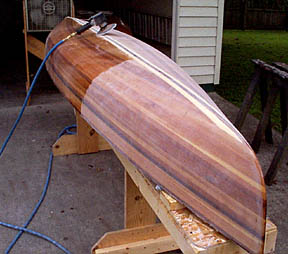
After an hour of so of sanding, the outside of the hull is ready for varnish, and it can be removed from the molds.
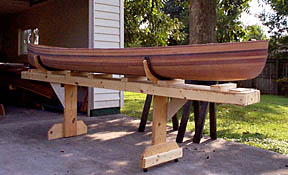
Cradles were fabricated and padded with foam pipe insulation so the inside of the hull can be finished.
The inside of the hull is more challenging than the outside due to the concave curve of the hull. On the other hand, I don't feel quite the need for a flawless finish in the inside; matter of fact, it won't receive as many coats of resin.
A SurForm scraper can be used to fair some of the strips, but I just grab the sander with some 60-grit paper and start slingin' dust!

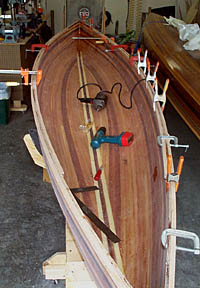
This what the inside of the hull looks like immediately after the first dose of epoxy. The hull was sanded about eight hours later and another coat of epoxy applied with a foam brush. Only two coats will be used inside the hull to avoid unnecessary weight (and sanding!!). Two or three coats of varnish with sanding between coats will create a nice finish without the additional coats of epoxy.
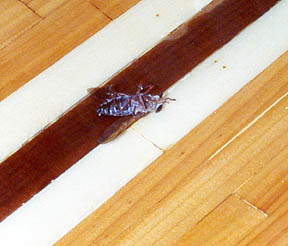
Here is a good reason not to apply epoxy at night! The next morning I arrived in the shop to find a huge, suicidal horse fly belly-up in the glossiest, deepest part of the epoxy. Even after the carcass was removed, there was an accurate relief image of the intruder in the epoxy. Fortunately, the resin was thick enough to allow the bad memory to be completely sanded away............
Rails (gunwales) were cut from an oak plank procured from the nautical department of a local Home Depot. Since the board was nine feet long, and I needed outside rails that were 12'6", I scarfed a couple of sticks as necessary. The rails are 3/8"x3/4", and are attached to the hull with glue and brass #8 screws.
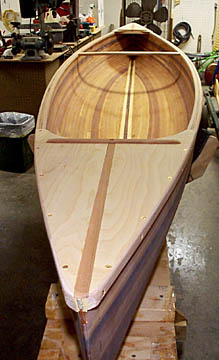
The decks were fabricated from stuff on hand in the shop, namely a couple of scrap strips, leftovers from the oak rail board, and some orphaned 1/4" birch furniture plywood. I used more brass screws to secure the decks to the rails since they also serve as gussets to secure the tie-down thwarts.
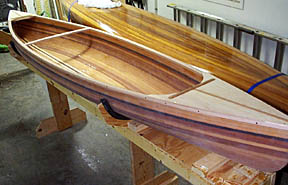
The Wee Lassie hull with rails, decks, and thwart. Cute, isn't she!
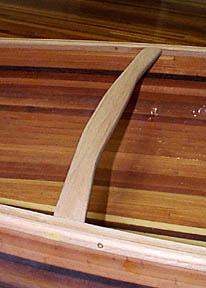
The thwart was shaped from a 25" long piece of red oak. It is attached to the rails with epoxy and a 3" drywall screw in each end; I wanted something more substantial than the soft brass screws. The heads of the drywall screws are buried beneath wood filler.
Forward to the finished Wee Lassie............and the Maiden Voyage!