Construction Tips and Other Stuff
![]()
This page contains various tips and bits of information from other
builders that I have accumulated since beginning the project. Let me know if you have a tidbit you would like to
submit to this page.
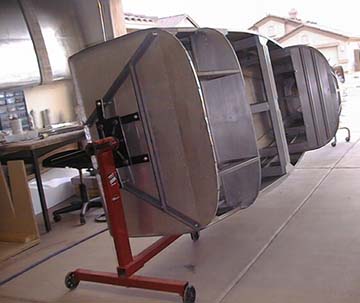
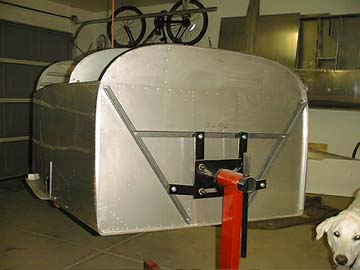
Paul Besing bought a $50 engine stand and fabricated some 1/4" steel angle to fit the engine mounting holes on the firewall. After measuring, cutting, measuring some more and some more cutting and drilling, he had a stand that allowed him to move his fuse around the shop, and the best part is he can rotate it when working inside or on the top of the fuse. Paul credits Dale W. Ensing, Cary, IL, with the inspiration for the fuse stand.
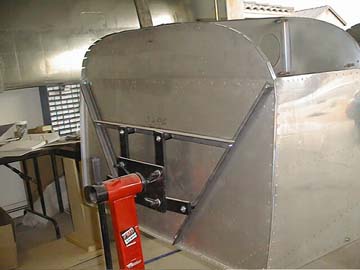
"It was an absolute necessity in my opinion. It was particularly
handy when I was drilling my rear top skin. The rear of the fuse is supported in my
installation with a tall shop chair with wheels on it. The original design included a
peice of steel pipe that was threaded into a pipe flange that was bolted to a piece of
wood. The wood was bolted to the furthest aft bulkhead through the tooling holes. The pipe
could then rest on a sawhorse."
Note the innovative method of using firehose to mount the wings on the
wall in the background..
(Maverick, the dog, is learning the fine art of rivet bucking...er, I mean, barking......)
Here is another tip from Paul Besing:
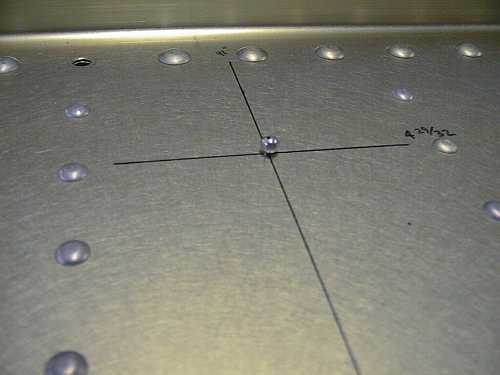
"I am currently helping my buddy Larry Olson with his wing kit. We came up with a
method of securing the fishing line to the front spar, and securing the line to the plumb
bob, without using the 'ole "tying many knots" trick. We drilled a hole in a BB
and tied a knot around that. You know then that the
BB is centered in the hole, and the line is too!
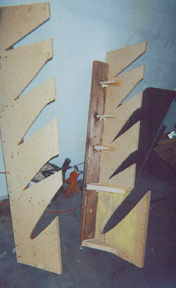
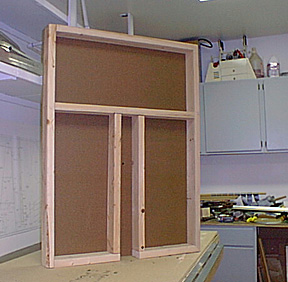
Charlie Kuss had to find someplace to store the emp components while the shop was full of wings and fuselage. "The racks are made from 2x6's (2x4's will work. I used what I had laying around) and 5/8" particle board. I used the blueprint of where to flute the various ribs as the cutout templates."
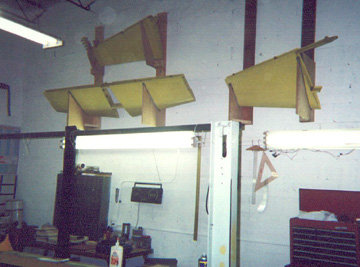
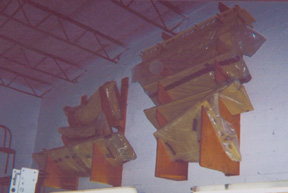
Charlie has recently updated his racks to hold additional control surfaces:
Here is a great post pulled from the RV mail-list. RV6A builder John Devlin made the following observations after
working on his plane for thirteen months:
John Devlin's RV6A Shop Experiences
Ever wonder if all those blunders you are making are really significant or just first-time
"Builder's Jitters"? Don McNamara
wrote a hilarious essay on taking the "Jitters" to the extreme.
RV Accident Report
RV8 builder Rod Woodard submitted the following tips which are easy to implement:
"Socket to Ya" rod-bearing tool
"Bob Skinner suggested this to me: I bought an extra 11/16th"
socket and simply ground down two of the little nubs. It fits perfectly over the smaller
bearings. I'll need to make a bigger one for one of the bearings on the rudder (I think).
A Dremel tool with a grinder bit worked perfectly. Took less than 5
minutes." (Editors note: You can also see how to
make Sam's rod-end bearing tool)
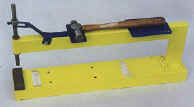
Portable C-Frame Table
"The table is made of 2x4's and topped with 1/4" hardboard...
the stuff they make pegboard
out of, without the holes. It's smooth enough that I don't feel the need to put carpet
over it."
(Editor's note: Rod is obviously going to build a great -8; Notice the R/C field box on
the shelf!)
Here is a tip from RV3 builder Jim Oke:
At various stages in construction, there will be a need to cleco skins or whatever in
place for a period of weeks or even months as internal structure gets worked on. On my
RV-3, I recall that I left the skin above the back of the instrument panel off for access
while I sorted out instruments, plumbing, and wiring problems.
There are several problems with using clecoes to hold skins in place for an extended
period of time:
1) Clecoes are not that tight so the skins can shift a bit. (OK, so I skimped on clecoes
occasionally, but I needed them elsewhere.)
2) Leaning on the clecoes bends and deforms the "fingers" on the cleco.
3) Leaning on the clecoes is not too comfortable for the table muscles as one delves
deeply into the innards of your RV as you search for that dropped washer, etc.
My solution was to use a handful of soft aluminum "pop" rivets (alright, I know
that most "real" RV builders will be coughing, hacking, and spitting after using
the "p" word in public) to hold the structure
together on a semi-permanent basis. Although hardly structural, they did fine holding
things in place before final riveting rolled around. They were much more comfortable to
lean on and my precious clecoes stayed in good shape and were freed up for use elsewhere.
Much later, it was easy to drill out these temporary rivets and install the
"real" rivets.
Incidentally, this is one case where "cheaper" really is "better". The
cheaper the pop-rivet, the softer the aluminum they are made of and the weaker they are
structurally. That's fine because all that is needed is
a snug fit for a few months and then, having served their purpose, they can be more
readily drilled out than the pricier ones.
Another great idea for those dimpling blues. This one is from Bud Newhall. This page will show you how to modify your C-Frame Tool so it will be semi-automatic!
Bud Newhall's C-Frame Thing-A-Ma-Jigger
Here's a builder's tip from Brad Hiatt:
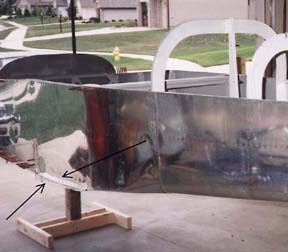
Before you install your wings, run a bead of silicone sealant along the joint
where the fuselage sides meet the overlapping belly skin. This will help keep water from
seeping under the seat skins if you leave the plane out in the rain or just wash the
airplane. The water may cause corrosion of the belly skins and seat ribs.
(Editor's note: I suspect this tip is more applicable to RV-6A's than taildraggers.)
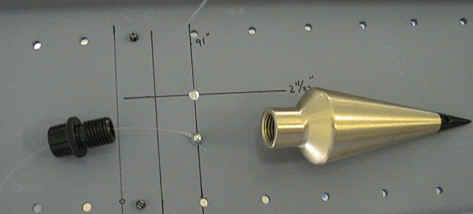
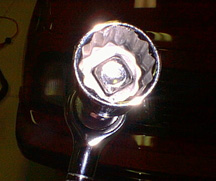
As anyone who has mounted control surfaces knows, getting the bolts into the bearings of the elevators and rudder can drive you crazy. Here is a tool submitted by RV-8A builder Jerry Carter and designed by his friend Ed that helps get the bolts started in a very confined area.
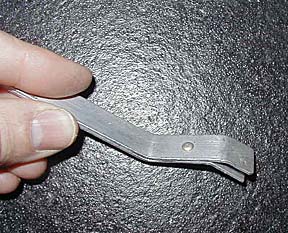
This is just two pieces of scrap stock that are formed as shown and riveted together.
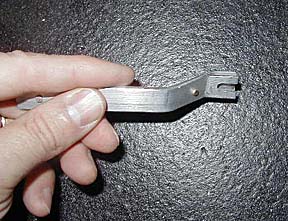
Here is the secret of how this thing works. The slot catches the bolt and the two pieces are formed so the bolt head is held in the slot by friction.
You must actual try mounting control surfaces to really appreciate this simple tool!
From Jim Bower:
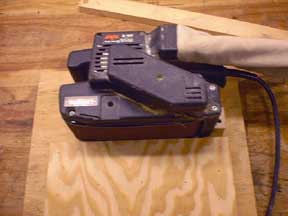
"Being on a tight budget, I didn't want to spring for a bench-mounted belt sander. I rigged up this one with my hand held sander.
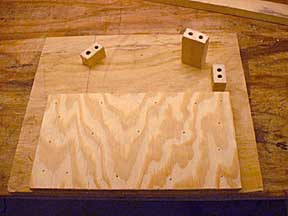
Basically, it lays flat on its side so all I needed was a way to hold it in place. What you see are a base made of scrap plywood, a stage to get the workpiece above the level of the belt, and some strategically placed blocks to keep the sander from moving around. Gravity holds it down to the stage."