Wing Spars Construction Log
![]()
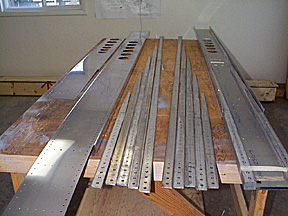
1/30/98; 3.5 hrs; Inventoried wing kit, all parts present.
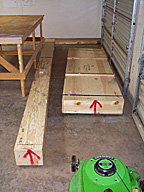
The kit arrives in two crates, 200 lbs each. I never could figure out for sure which side of the box was "up"..... The Lawn Boy is not included; Joyce parked it close by so I wouldn't forget that other things beside RV creation have to be done.
Van's was nice enough to include the classifieds of the Sunday edition of the "Oregonian" in the packing material; Thought I'd see it they are advertising for openings at the home office....
The spars are predrilled and lightening holes cut.
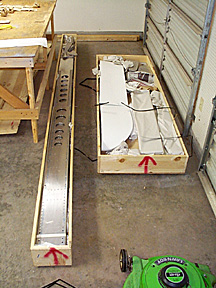
1/31/98; 3.0 hrs; Disassembled right spar; deburred edges and holes; Scotchbrited components.
Right spar (on left) disassembled.
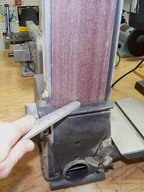
The belt sander makes quick work of rounding off corners of spar flanges.
2/1/98; 1.5 hrs.; fabricated stiffener angles (all); drilled both tie-down bars; scotchbrited in preparation for primer.
(Note: I will be doing everything in assembly-line fashion whenever possible. This is why both tie-downs and all stiffener angles were fabricated at the same time. It takes much less time to build in this manner than to come back later and repeat the same job.)
2/2/98; 6.25 hrs; disassembled left main spar; deburred and scotchbrited spar
components; fabricated flanges and doublers for rear spars; drilled flanges and doublers
to rear spars; main and rear spars now ready for priming and assembly. 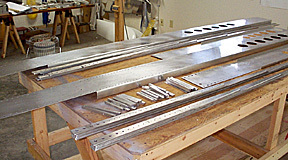
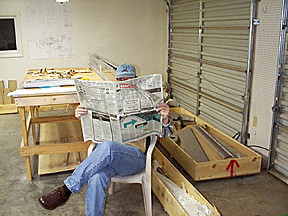
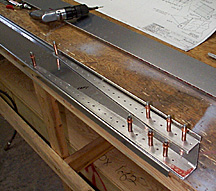
Main spar components awaiting a warm, sunny day for priming.
Primer being used for the project is Sherwin-Williams P60G2 Industrial wash primer. This is a self-etching primer that is mixed with R7K44 catalyst. The primer should be applied in a very thin coat and will be translucent when applied properly. Only surface preparation necessary is to dull the aluminum with a maroon ScotchBrite pad and wipe off the surface with coleman's lantern fuel.
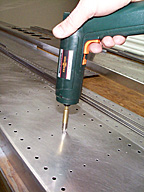
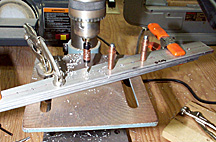
A rechargeable screwdriver makes relatively quick work of deburring the millions of holes in the spars...
The flanges for the rear spar were drilled simultaneously.
The flanges and doublers are match-drilled to the rear spar.
2/10/98; 5.0 hrs; assembled and riveted bellcranks, and bellcrank angles to ribs;
assembled fuse bulkhead; assembled spars and riveted spar reinforcing bars and angles to
spar webs. Spars are ready for 3/16 rivets.
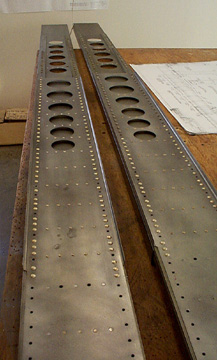
2/11/98; 1.0 hr; riveted rear spar together; rear spar now completed.
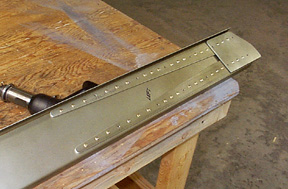
Root detail of left rear spar.
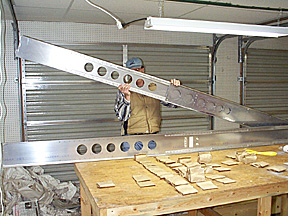
2/18/98; 3.0 hrs; riveting right main spar.
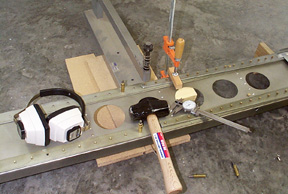
High-tech equipment gathered for spar-riveting party: Shooting muffs from Walmart, C-frame tool from U.S. Industrial Tools, three pound hammer and adjustable clamp from Home Depot, dial calipers (for measuring shop head of rivet) from wherever.
Wish I had bought some knee pads while I was at Home Depot....
2/19/98; 2.25 hrs; completed riveting both spars. I was pleasantly surprised at how well the C-frame tool set the 3/16 rivets. All rivets look good and none had to be reworked. Rivet time on first spar was 4.0 hrs, and second spar took 1.25 hour.
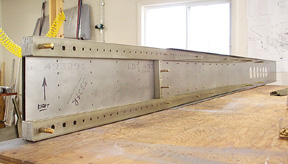
Wing spars now complete!
Total time spars: 25.50 hrs.
![]()