Rudder Construction Log
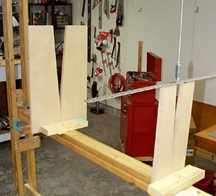
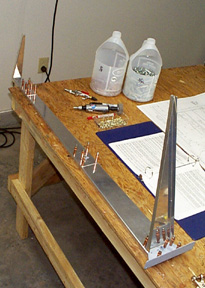
Using ye 'ol plumb bob to align the rudder fixtures.
11/10/97; 2.5 hrs; drilled skin to spar; fabricated stiffeners; drilled right-hand stiffeners to skin.
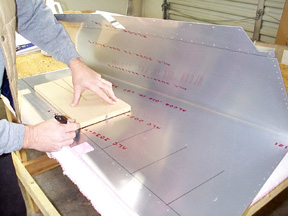
One of the control surface jigs included in the kit makes a great square for laying out the lines for the stiffeners.
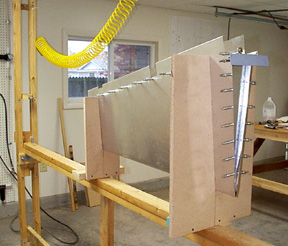
Right side stiffeners drilled and clecoed to rudder (and the table).
11/11/97; 5.0 hrs; drilled stiffeners to left side; dimpled stiffeners and skin; fabricated back rivet table; backriveted stiffeners to skin; assembled and drilled spar components, primed plate nuts and rudder horn; reassembled components for riveting.
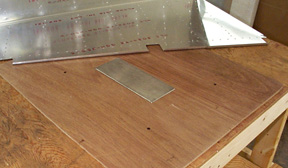
Since I didn't want to route a hole in the bench for the back rivet plate, I cut a hole in a piece of plywood and screwed it to the bench. The plate then dropped into the hole. All edges on the plate and ply were sanded smooth.
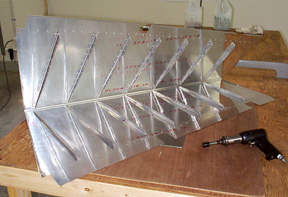
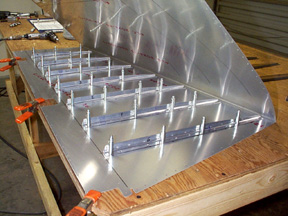
Skin with stiffeners riveted in place.
Rudder spar ready for riveting. The hand-holding stopped on this assembly. Details concerning the assembly of the rudder horn and associated parts were sketchy at best. Never did find a detail that called out rivet length for the reinforcing plates. It is difficult to tell from the drawing, but since the holes for the rivets holding the platenut to the horn are prepunched through the spar, the AN426 rivets must carry through the spar. Drawing calls for -6 rivet which is too short, -8 is proper length. Why does the plate nut at bottom of spar get 426 rivets and the other nuts get 470's?
11/12/97; 1.0 hr; riveted spar components together; bent trailing edge with home-made sheet metal brake; mounted skeleton and skin in jig and drilled rib holes.
11/13/97; 4.25 hrs; fabricated rudder horn brace and riveted to spar/rib; dimpled ribs;
fabricated rudder tip attach strips; drilled and dimpled tip attach strips; riveted
skin to skeleton..
11/14/97; 2.25 hrs; formed leading edge and riveted together; trimmed and cut rudder fiberglass tips for fit.
11/29/97; 1.5 hrs; attached fiberglass tips; applied lightweight filler to joints.
12/1/97; 1.75 hrs; filled and sanded, filled and sanded, etc.; primed rudder with auto primer.
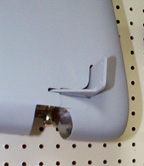
Detail showing how rudder bottom was cut to fit around rudder horn.
Rudder completed.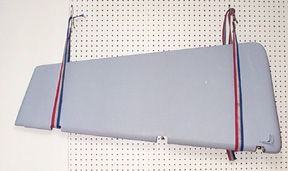
Total time rudder: 18.25 hrs.
Let's get started on the elevators