Sam Buchanan's RV6 The Panel |
 |
|||
Page One
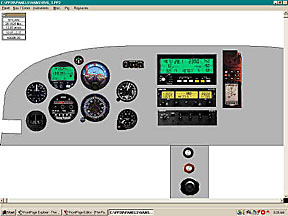
This section contains info about the design and construction of the panel in N399SB 10/23/98; Perhaps the most highly personalized portion of an RV project is the instrument panel (well, maybe also the paint scheme, but that is another story). Many issues have to be addressed when planning the panel. Will it have the capability for IFR flight? Will it be designed for VFR only flight? Will it have vacuum gyros? How much will we spend? My first inclination was to design a conventional IFR panel since I am IFR rated. My first panel layout looked something like this:
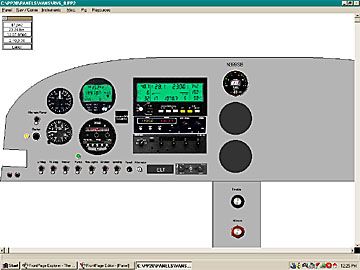
Since I intended to include the Navaid autopilot, the RMI uEncoder, and the RMI uMonitor, the panel wasn't quite conventional but still had the basic six flight instrument scan. I decided to use 2" airspeed and altimeters since they would be needed only for backup. But............just how often will I be flying the RV6 in IMC? I don't know! The more I considered the additional expense, weight, and maintenance of the IFR panel, the more I began to question the wisdom of installing the IFR stuff at this time. Why not fly the plane with a VFR panel for awhile, then upgrade to the IFR panel if indeed I decide that the IFR capabilities are warranted? As this project has progressed, I have noticed more and more RVs that are loaded down with big panels, plush interiors, and heavy paint. Many of these pilots also complain about how hard it is to get their planes into short fields. Could it be that their RVs have gained enough weight that they no longer fly like an "RV"? I have decided to go with the simple approach. My plane has manual flaps and trims, will have simple upholstery, a tip-up canopy, light weight paint, and no nose gear. I intend to land on every grass field I can find. My last few hundred hours of flying have been in a Cub which has taught me the value of simplicity. I have gotten spoiled to not watching needles on the panel every moment, and the plane has flown reliably in spite of not having numerous gauges. Why won't my RV fly just as well, even if I don't have a gauge to measure everything from EGT to the Dow Industrial Average? Actually, with the RMI and Navaid units I will have every capability of the "conventional" panel with the exception of the attitude indicator and directional gyro. The difference is that instead of having instruments scattered all over the panel, all parameters can be monitored from a couple of units right in front of my face. Alarms can be set to get my attention if something goes awry, but otherwise my gaze will be outside the canopy instead of inside. So, here is the result of the above progression of thought:
Notice the air vents in the center of the panel (the round things beneath the dual fuel gauge). What am I going to do with the expanse of panel on the right side of the cabin? I dunno. A TV, maybe? My only concession to conventionality was to retain a mechanical airspeed indicator. I felt the 2" indicator was good insurance in the event of an electrical failure, especially at night. The G-meter will keep me honest as I develop my tolerance for unusual attitudes. The Electronics International FL-2 fuel gauge is very accurate, works with the senders Van's sells, and has LED and digital readouts for gallons remaining. I elected to omit the flow transducer from the RMI uMonitor and spend the bucks for the EI unit. The EI gauge tells how much fuel is in the tank, not how much has been burned. Yes, this panel is unorthodox, and no doubt will receive some derision from old-timers at flyin breakfasts. But that's ok with me! Some have asked, "What happens when you have an electrical failure"? The uMonitor has a battery backup, I intend to the same for the uEncoder, the GPS will operate on batteries, and I will be carrying a King KX99. What additional redundancy will I need for VFR operations? If you are unfamiliar with the features of the RMI units, you can check them out on their web site. They are enthusiastically endorsed by many RV pilots, and represent great value for the dollar. By the way, you may have noticed the absence of a compass. RMI now offers a remote compass module that will display the magnetic heading in the uEncoder! Another advantage of this panel is that there are few pieces to purchase. I already have the uEncoder (purchased used), and the uMonitor and compass module is due any day. I will be assembling it from the kit, so I will keep you informed. I have the TKM Com11, PS 501 intercom, and ACK ELT in hand as well as the Navaid system. All I need is the transponder to begin panel construction in earnest. Stay tuned. 11/5/98; 2.75 hrs; installed ACK ELT.
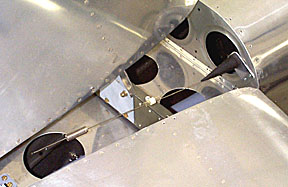
The antenna is installed under the tail fairing.
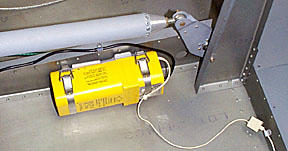
ELT is bolted to elevator bellcrank rib. Access will be through baggage compartment bulkhead.
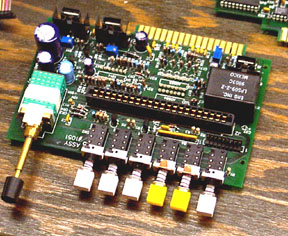
The week of 11/9/98 included about 5 hours spent soldering boards for the RMI uMonitor. There are three circuit boards in the unit, and only moderate soldering skills are required for assembly.
Here are the three boards. The display and CPU boards consist mostly of pin-mounted IC's. Only the main board has a large number of discrete components.
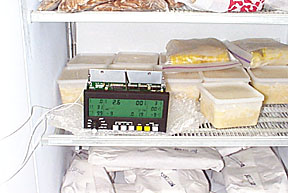
The main board also carries the switches and power supply. I felt the quality of the kit was adequate for builders who have little electronic assembly experience; A good manual is included in the kit. Most important is steady hands, good bifocals, and decent soldering skills. Assembled units are available for about $300 additional. I figured doing the assembly on this unit paid for the compass module for the uEncoder... 11/18/98; 2.0 hrs; completed assembly of uMonitor and fired it up...it works! Next step is the torture test in the freezer followed by the hot box.
11/19/98; uMonitor chills out with the corn and steaks before getting roasted for 48 hours (there aren't as many steaks in the freezer since this RV thing got started...).
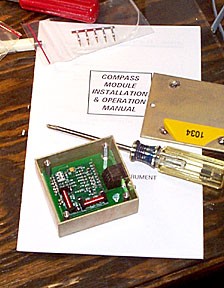
Here is the compass module that interfaces with the RMI uEncoder.
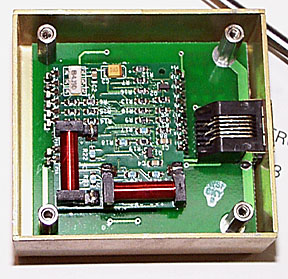
Interior shot of the compass module. There are no moving parts!
Please submit all questions and comments to sbuc@hiwaay.net
|
Getting Ready to Build Building the Tail Building the Wings
|
|