Panel Page
Firewall Forward
Interior Installation

6/8/99; 4.75 hrs; primed control surfaces.
6/9/99; 3.0 hrs; painted ailerons and flaps.
6/10/99; 5.0 hrs; prepped and painted elevators and trim tab.
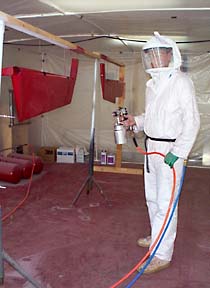
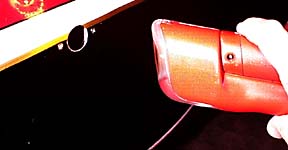
Well.......the X-Files operatives have arrived in Alabama.....and painting
RV's no less! The pressurized hood does a great job of keeping the noxious urethane fumes
from the operator....operator.....operator.....and is much more comfortable than a
respirator....and looks way cool!
Hood is feed by the blue hose connected to a 3/4 hp oil-less compressor
located way outside the shop. The overspray on the floor gets mopped up after
each session so dust won't be a problem in following sessions.
The Devilbiss HVLP gun and I are getting on better terms as the project
progresses. I have had to learn to paint with a slower rhythm to avoid paint starvation on
the surfaces. Two color coats are being applied, the second is a gloss coat applied ten
minutes after the first. I am not trying to apply much of a gloss coat on the bottom
surfaces since there is no need to add useless weight where it won't be seen. The PPG
Concept paint is easy to work, and dries to the touch in about thirty minutes.
Rigging the control surfaces for painting is a time-consuming pain. I have
no good ideas, so you are on your own in this area. Ideally they would be situated
horizontally, and readily rotated, but hanging them was much easier.

Part of painting in the mornings is getting parts ready at night. The
rudder is getting final prep.
6/11/99; 5.5 hrs; painted rudder, gear fairings, and intersection
fairings.
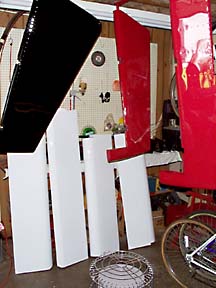
Ah, yes...control surfaces painted and hung in storage.
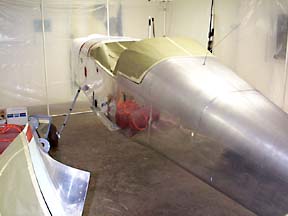
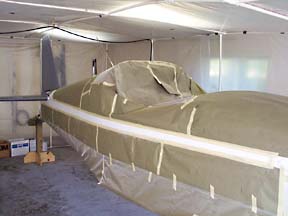
6/14/99; 2.0 hrs; prepping fuse.
If you look closely, you can see the effect of ScotchBrite on the
turtledeck skin. This is why it is sorta silly to worry about keeping your project shiny
while under construction!
6/15/99; 6.5 hrs; prepped the fuse; sprayed primer on fuse.
6/16/99; 5.75 hrs; prepped fuse and painted bottom of fuse; masked bottom
of fuse.
What appears like plane pox is actually glazing putty. All the little
dings and "oops" were touched up with auto aerosol primer and glazing putty.
This is the reason I don't get too concerned about mis-hit rivets; You can
usually repair the damage later.
No, Mr. Airplane did not fall down and go boom-boom. After priming the
bottom of the fuse from a mechanic's creeper, I vowed never to do that again!
Us taildraggers can just raise the tail and hold down (natural
tendency of the plane is to tip forward) the tailwheel as we walk under the fuse.
6/17/99; 2.0 hrs; masked bottom of fuse and painted (sorta) sides of fuse.
There is a very fine line between applying sufficient paint to
get a glossy finish and applying enough paint to create sags and runs. I have been
building up my experience with the HVLP gun and working toward that fine line. Today, I
found the line and crossed it. The problem areas turned out to be rivet heads which seem
to collect just enough paint to cause a small sag below the rivet. Keep in mind that I was
painting "Raven Black" on a vertical surface which will probably be the most
challenging part of my paint scheme. However, the PPG Concept paint sands very nicely
after a few hours drying time, so out came the 360 wet-or-dry and the sags were dispatched
without much trouble. Another, slightly lighter coat was then applied. I intend to buff
the top and side surfaces of the plane once the painting is completed so I am not
devastated by minor blems at this point.
6/18/99; 2.0 hrs; masked fuse in preparation for painting top decks.
6/21/99; 4.5 hrs; prepped and painted top decks; painted canopy frame.
6/22/99; 5.75 hrs; masked for trim accents on fuse; painted trim; removed
masking paper from fuse!
There are times when you are convinced that you are just making a giant paper
airplane! Lots of masking paper is required as the various trim colors are added (and my
color scheme is simple!).
6/23/99; 3.75 hrs; touched up minor boo-boos (bigger boo-boos get taken
care of later); installed elevators and rudder.
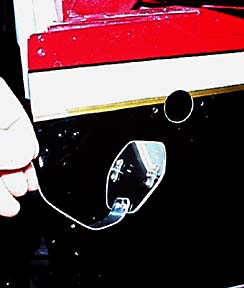
I had originally intended to install the elevator pushrod bolt through a
single inspection hole. After struggling for a while, I decided to add another access
hole. A 1" hole was drilled on the right side of the fuse so a socket extension could
be used to tighten the bolt.
A lexan cover was fashioned for the hole. The handle is so the cover can
be held in place from the large hole on the left side.
The lexan cover allows the use of a flashlight for inspecting the very
critical pushrod bolt.
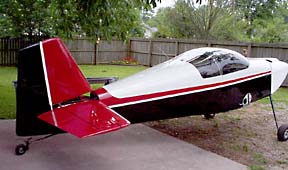
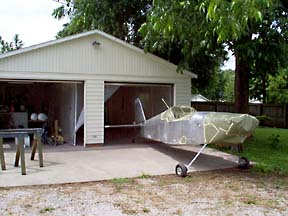
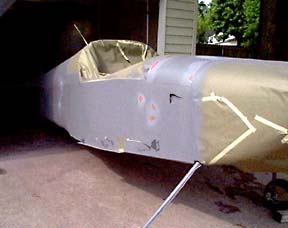
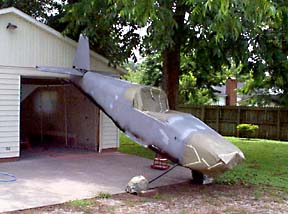
First roll-out, and a chance to see how the color scheme is going!
Still a long way to go....
In spite of my best efforts at masking, a very small amount of underspray
ended up on the canopy (must have blown under a loose section of tape). A rag slightly
moistened with acetone quickly removed the paint without visibly damaging the canopy.
Forward to Paint, page three
Back to Paint, page one
Back to RV6 Home Page
Please submit all questions and comments to sbuc@hiwaay.net
|

