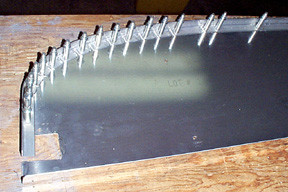
9/21/98; 4.0 hrs; construction of canopy frame.
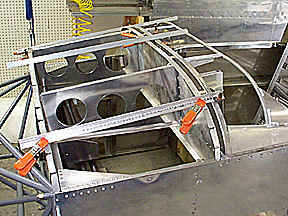
9/25/98; 2.5 hrs; pretty much finished assembly of canopy frame;
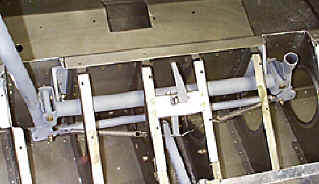
fabricated hinge mount points.
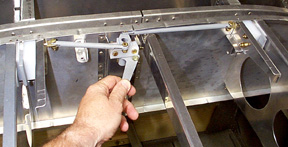
The canopy frame takes a lot of tweaking. I had to cut the
tubular brace so the hinge brackets would line up properly. Short lengths of tubing were
telescoped into the brace to lengthen it as necessary.
More tweaking will be necessary. I am now ready to rivet the frame
together, then assemble the jettison mechanism.
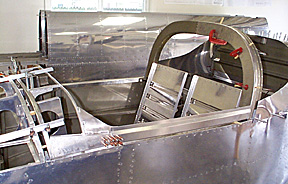
9/27/98; 2.0 hrs; riveted canopy frame.
9/28/98; 2.25 hrs; fabricated and riveted angle to instrument panel.
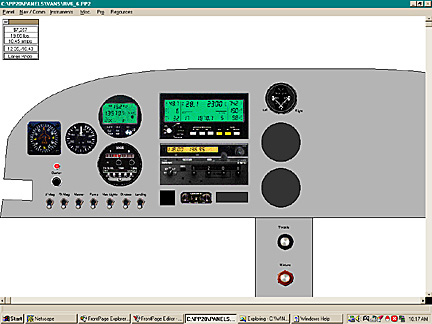
Here is the proposed panel layout (as of today...). Printout is from Panel Planner software.
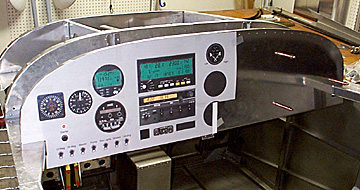
The two large black dots in the lower center of the panel are the air
vents. The vertical card compass may be replaced with a conventional wet compass.
Here is the screen capture from Panel Planner:
10/1/98; 2.75 hrs; completed canopy jettison mechanism.
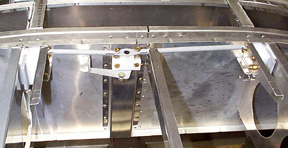
I decided not to build the complete canopy jettison mechanism because I
have no intentions of blowing the canopy in flight (I even wonder if it is possible!). The
mechanism is valuable, however, as a quick way to remove the canopy for maintenance.
Consequently, I deleted the jettison handle that is supposed to protrude though the panel
into the cabin.
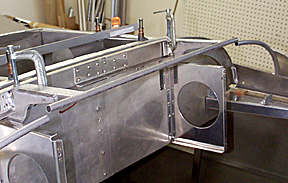
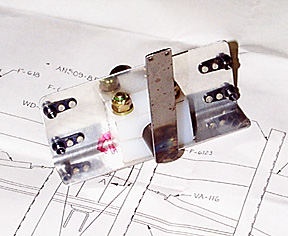
To remove the canopy, I will need to reach under the sub-panel, remove a
safety pin, and turn the mechanism. A 1/4" bolt was placed on the "handle"
to serve as a limit stop so the canopy pins could not be withdrawn completely from the
mounting blocks. Note also the custom-made bracket that will hold the safety pin for the
handle.
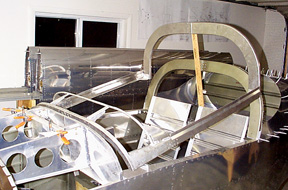
10/3/98; 5.5 hrs; drilled, dimpled, and trimmed forward top fuse skin;
mounted fuse on gear!
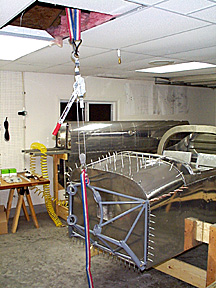
A come-along was hung from ceiling joists so the fuse could be hoisted to
allow mounting gear legs. The legs fit very easily once I removed the paint from the
mounting bosses.
There are a few pivotal points in the construction of an airplane; Setting
the plane on its legs is one of them.
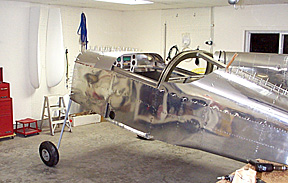
I found out very quickly, however, that it is going to be harder to work
inside the cabin now.
10/5/98; 2.0 hrs; drilled forward canopy skin.
10/7/98; 1.75 hrs; trimmed and dimpled forward canopy skin.
10/11/98; 2.0 hrs; drilled, countersunk, dimpled canopy side skins;
trimmed canopy forward skin.
10/13/98; 4.5 hrs; fabricated and installed gas lift strut mounts;
installed manual aileron trim system.
Here is the control protion of the trim system. I used single-ear
platenuts instead of the double-ear nut s supplied due to the limited space available for
mounting.
This is the completed system. Trim is achieved via spring pre-load on the
aileron torque arms. The springs are very light so they won't add stiffness to the aileron
controls.
Note: I wasn't happy with the way the springs were attached to the links
on the control tubes: The original configuration could promote premature wear of the ends
of the springs due to friction when the controls were moved side-to-side. I made S-hooks
out of stainless welding rod and used the hooks to attach the springs to the rods. Since
the hooks are free to rotate, no wear will occur on the springs.
10/18/98; 2.0 hrs; installed cabin air vent inlets.
Remainder of canopy construction is in the Finish
Section.
Back to Fuse, page eight
Back to RV6 Home Page
Please submit all questions and comments to sbuc@hiwaay.net
|

