Air Conditioner Shroud
Repair
 Around the time I was getting the
training wheels off of my first bicycle, the neighbor of my Overlander’s
original owner plugged the fence ROW between their two properties with pine
tree saplings. In short time, these
trees grew quite hardy, and provided a bountiful supply of pine needles, cones,
and dead branches. Unfortunately, my
Uncle’s driveway was situated directly underneath the trees, and what is now my
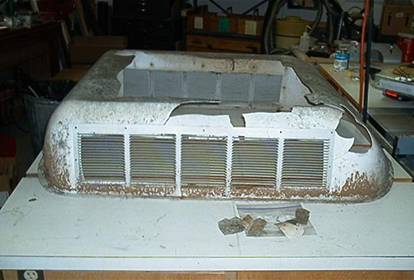
Overlander took more than its fair share of hits from falling branches. The air conditioner shroud, being made of ABS
plastic, responded particularly poorly.
Around the time I was getting the
training wheels off of my first bicycle, the neighbor of my Overlander’s
original owner plugged the fence ROW between their two properties with pine
tree saplings. In short time, these
trees grew quite hardy, and provided a bountiful supply of pine needles, cones,
and dead branches. Unfortunately, my
Uncle’s driveway was situated directly underneath the trees, and what is now my
Overlander took more than its fair share of hits from falling branches. The air conditioner shroud, being made of ABS
plastic, responded particularly poorly.
Although I am prone to go overboard fixing something instead of
replacing it, between the general condition of the shroud, and my general lack
of success in auto-body type repairs, I leaned very hard towards replacing this particular item. But, a new shroud was going to cost $225 plus
S&H, and since my Airstream had a list of higher priorities both time wise
& money wise, I set the shroud aside as angst for another day although I
did start researching effective repair techniques.
That day arrived seven months later when all the major repair
efforts were completed at a reasonable cost, and I finally had a clear spot on
one workbench. I set the shroud on the
bench, and stared at it while mentally reviewing the pros & cons of purchase versus patch. After considerable
thought, I pretty much decided that replacement
was in order. As a final confirmation, I
decided to walk away from it for a bit, and come back later to see if I again
had the same conclusion. So I got a cold
beer & proceeded to work some other task.
After two or three more beers, I staggered back over to that
dirty, brittle pile of antique misery sitting on my workbench, and instantly
decided that $225, although pricey, was not too
bad. So I went inside to contact the
only company in the world who sells the shroud.
Having dealt with this company before, I knew that Shipping &
Handling charges were determined when the order was filled, and the charges arrived
as a surprise with the order. Having
just paid about $22 to ship a 50 pound box big enough to ship a medium-sized
child to
$115 shipping plus $25 handling! ![]() Talk about killing a good buzz! It took me seven months just to work up to be
willing to pay for just the item. A
retirement home would find me tapping my second keg before I paid that kind of
money for the delivered item without first at least attempting a repair.
Talk about killing a good buzz! It took me seven months just to work up to be
willing to pay for just the item. A
retirement home would find me tapping my second keg before I paid that kind of
money for the delivered item without first at least attempting a repair.
After discussing the topic with others, I decided there were two
challenges to this project: Fill the
existing holes, and strengthen the entire shroud. While effecting repairs on my black water
tank, I had already researched & learned that fiberglass resin will not
stick to most plastics very well. On
another task, I had already experimented with “making” new plastic by
dissolving plastic shavings in Methyl Ethyl Ketone. While it is a sound idea, coming up with the
right formula to meet my present need was going to be time consuming. Then, while cleaning up the Shop one afternoon,
I noticed that the dried glue on a can of ABS Cement used in solvent welding
plastic plumbing together seemed to have many of the characteristics I was
looking for in the shroud’s patching material.
So, I laid some fiberglass cloth out on top of Saran Wrap, and saturated
it with ABS Cement. After the cement
dried, I was left an excellent patching material.
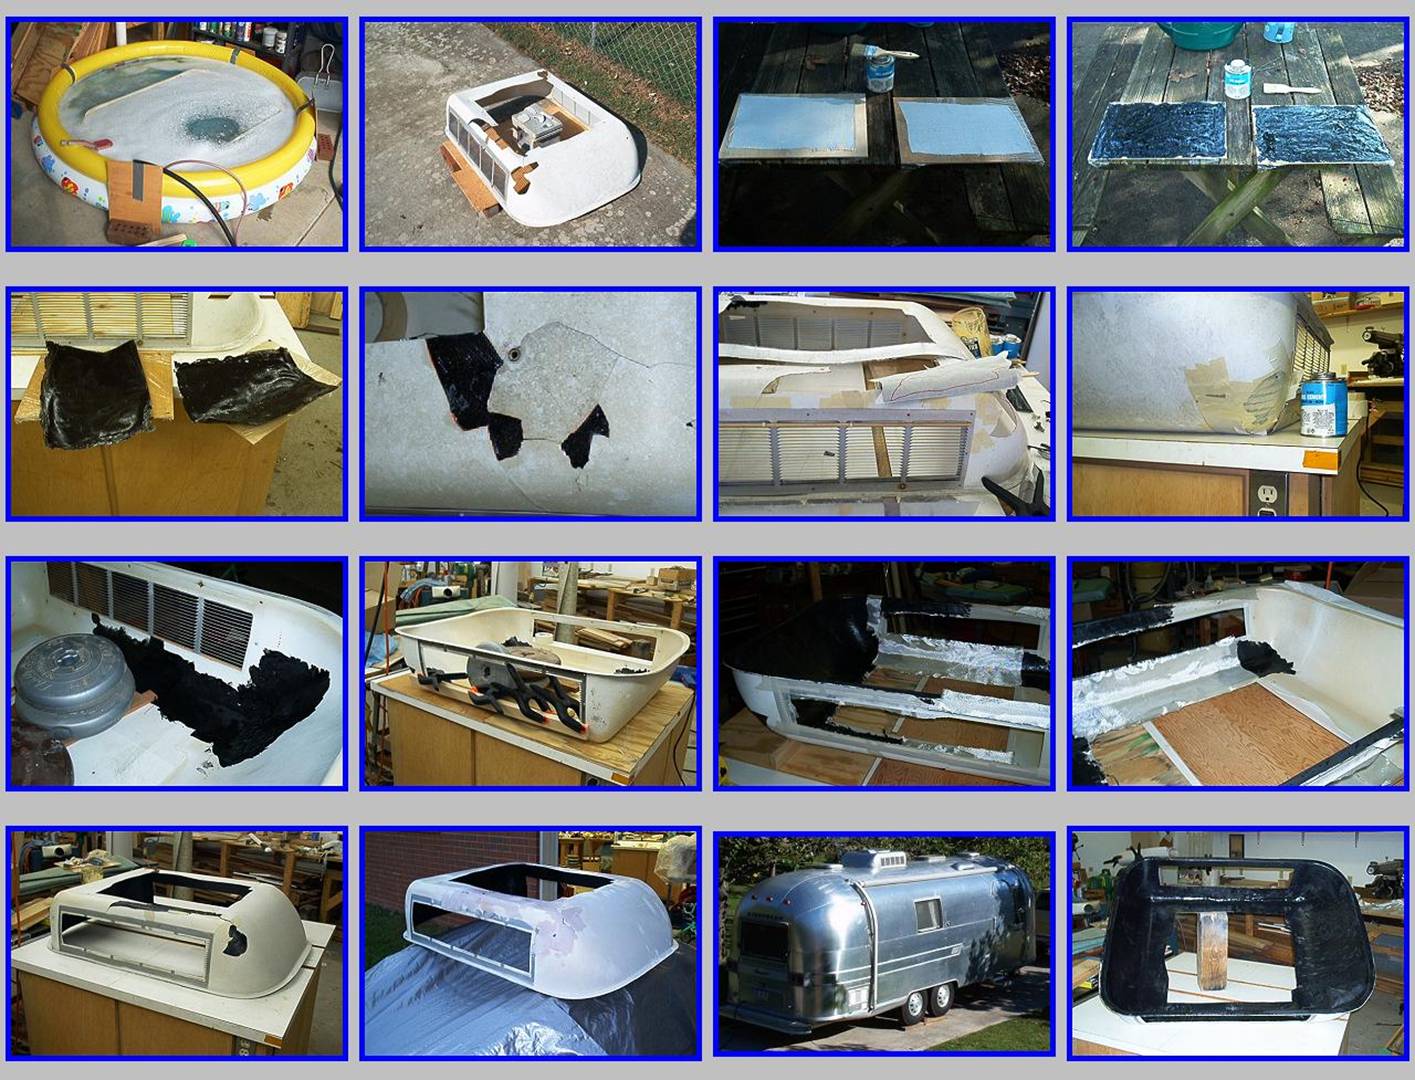
 To remove the dirt, mold, and lichen from
the shroud, the shroud was soaked & gently scrubbed periodically in a
solution of Tide & Clorox in an old inflatable swimming pool. After rinsing & allowing to dry for a day or two, it looked considerably better.
To remove the dirt, mold, and lichen from
the shroud, the shroud was soaked & gently scrubbed periodically in a
solution of Tide & Clorox in an old inflatable swimming pool. After rinsing & allowing to dry for a day or two, it looked considerably better.
Since, when dealing with curved surfaces, every little bit of
original material helps, all the small broken pieces found under the shroud
were pieced together, and held in their original position with masking
tape. After that, all the remaining
holes were filled by cutting my homemade patching material to exact size. That part got a bit tedious since so many
curves were involved.
Working on the inside of the shroud, small squares of fiberglass
cloth were then fitted over the patched areas & soaked with ABS
Cement. This effort took place over
several days since the shroud had to be supported at various angles to keep the
cement from dripping out of the area under repair.
Once the shroud was strong enough to
support itself, the side grilles were removed, and the entire inside area was
reinforced with cement impregnated fiberglass cloth.
Top-side, most of the patched areas
turned out well. Those that did not were
simply because the curvature ended up with a flat spot. Some were filled with additional cement, but
all were wiped with Bondo to smooth them out.
Since the height of the mounted shroud makes it difficult to spot
boo-boos, I probably spent too much time Bondo-ing
& sanding, but I already told you I was prone to going overboard. ![]()
The original plan was to purchase
really good, original color paint & clearcoat to
use in my spray gun. But between the
cost of the paint, the respirator, lack of paint booth, and the fact that I
really don’t know what I’m doing with a spray gun, I opted for good spray can paint.
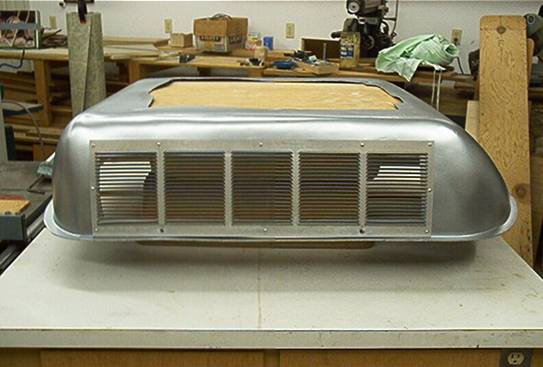
With the fiberglass mat strengthening the shroud, the shroud is as good as
new if not stronger. Granted although it
is probably not as strong as a shroud made completely out of fiberglass,
ultimately, the only “flying debris” issue of concern is not self-destruction
but rather the small amount of Bondo used to make the patch lines look good.
But the since the amount used was so small, I see no associated safety hazard
for anyone traveling behind me.
Although I did not weigh the shroud before or after the repair, I
was careful to not glob cement or mat on unnecessarily. Although I consider the
weight gain insignificant in the grand scheme, I have not tried to ship the
shroud anywhere…