Floor Preparation for Sheet Vinyl
One
of the first refurb criteria established was the
installation of a smooth floor. Wood
floors look great, but don’t care much for the uncontrolled temperature
environment an Airstream sees most of the time.
Plus, any un-cleaned up water spills stand a good chance of buckling the
floor.
Square
asphalt-type tiles are more durable, but they too don’t weather too well with
wide temperature swings. The tiles will
shrink in an uncontrolled environment leaving gaps.
Sheet
vinyl appeared to be the perfect solution.
However one noted Airstream authority claimed the vinyl would split at
the seams between each 4X8 sheet of plywood floor decking due to the normal
flexing an Airstream experiences while being towed through a variety of road
conditions.
The
commonly accepted solution to this problem is to scab new 1/8 or 1/4 inch Luan
plywood over the existing seams. Problem
is this adds weight. Additionally, in my
case, I was planning to install wall-to-wall flooring, and the additional floor
thickness would not allow everything sitting on the floor to be reinstalled in
the existing rivet/screw holes.
 My two part solution is, as far as I know, unique. The first part, as documented on this page
involves strengthening the joints with ¼ inch dowels bonded in place. Then, after the vinyl was fitted &
allowed to rest for a week, it was only glued around the perimeter of the
installation. After three seasons & six
trips, I see no signs of distress, and the vinyl still looks great. Details on the vinyl installation can be
found on another page.
My two part solution is, as far as I know, unique. The first part, as documented on this page
involves strengthening the joints with ¼ inch dowels bonded in place. Then, after the vinyl was fitted &
allowed to rest for a week, it was only glued around the perimeter of the
installation. After three seasons & six
trips, I see no signs of distress, and the vinyl still looks great. Details on the vinyl installation can be
found on another page.
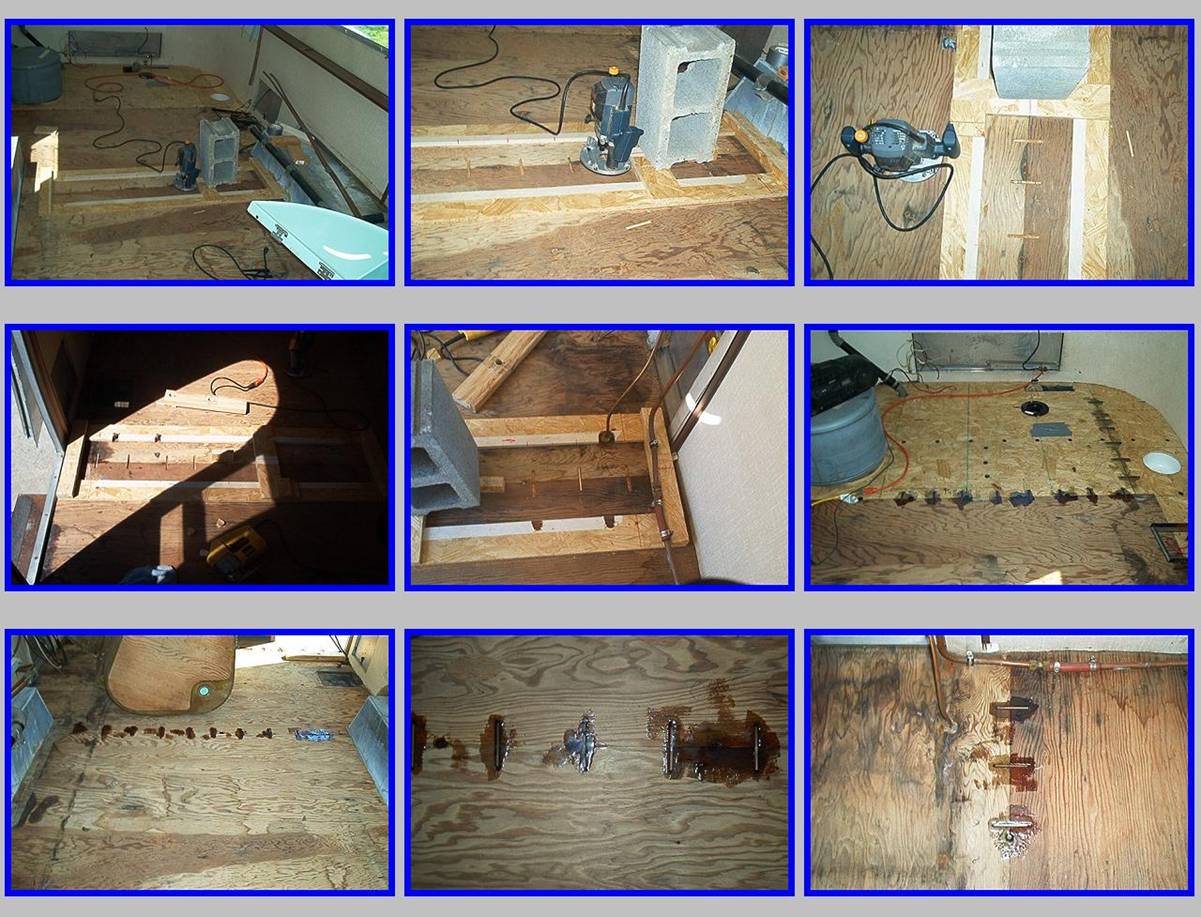
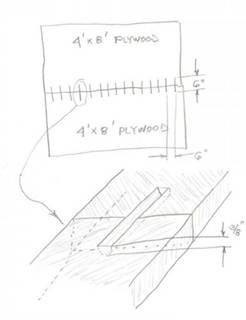
As
always seems to be the case, building the jig to accomplish the task took
almost as much time as the task itself! Built
out of scrap OSB, and designed to fit my plunge router, it features a sliding
fence held in place by a concrete block.
Although there are equidistant hack marks on the jig for uniformly
spacing the dowels, I found that Airstream did not space the decking’s elevator
bolts according to a decipherable plan. ![]()
Operation
was simple: Simply align the jig with
the floor seam, set the fence at the desired location & clamp it with the
block, and route the dado. After all
dados were cut, the floor was vacuumed, and each dado was filled with
fiberglass resin and a dowel.
My
original plan was to use ¼-20 steel all-thread for the dowels. But after much consideration, I decided it
was overkill, and there was an excellent possibility of the different
expansion/contraction rate of steel popping the seam apart on its own. So I used ¼ inch hardwood dowels in everywhere
but the forward/aft seam in the bathroom.
That particular seam will be covered on another page.
Oh, the patched water line
seen in one of the pictures was replaced before we ever hit a campground. ![]()