Airstream Air Conditioner Rainwater Leak
My 1967 Airstream Overlander has been on the road much more than usual this year due to college campus visits to help our high school senior decide where he wants to spend the next four years of his life. Unfortunately, all that traveling created or exacerbated water leaks in the bathroom, and near the Boyz’ beds.
In addressing the repair, my first thought was that all the leaks originated at the original Bay Breeze air conditioner because everything else on the roof had either already been sealed, or looked okay. Plus this was not the first time the AC unit had leaked.
Earlier this summer, I attempted to resolve the issue with a can of Great Stuff foam sealer. After protecting the condenser fins with a wax-paper covered board, the plumbing/electrical pass-through hole was deluged with the stuff.
Next, since there was a minor issue with rainwater dripping off the interior fan motor shaft, the base of the fan motor also received a liberal application of the modern-day material.

Zero joy on the results of the effort; the camping season was finished up with virtually no change in leak rate. The next obvious step appeared to be removing the top portion of the AC to inspect the roof skin under it.
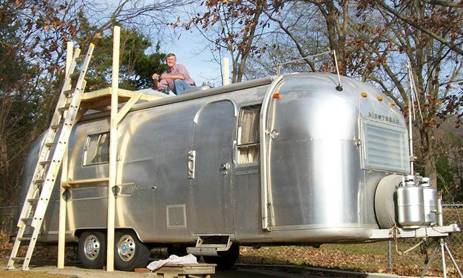
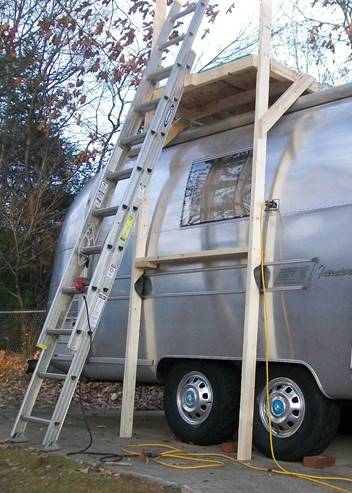
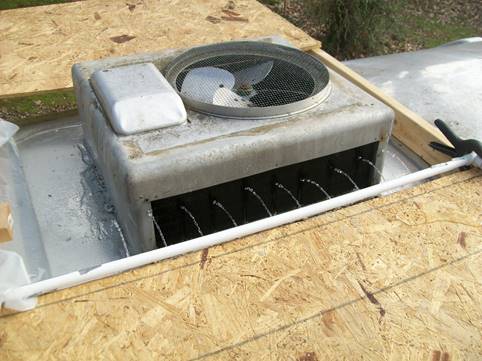
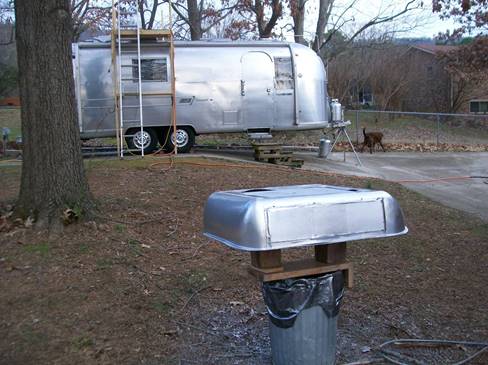
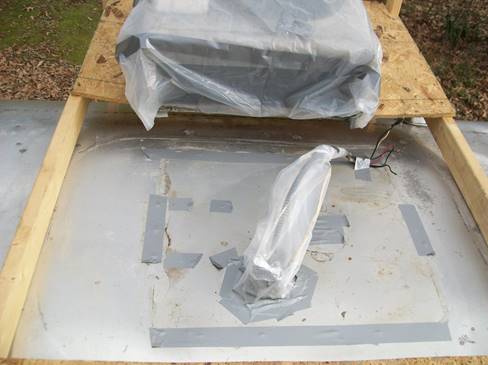
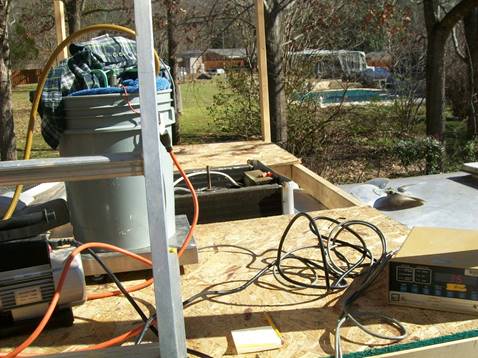
For this undertaking, a simple scaffold was constructed of 2X4s and 7/16” OSB to provide both a safer work area, and staging room to hold the removed parts.
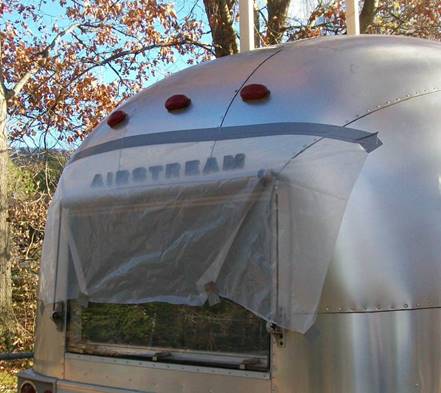
Between the freezing weather, prediction of rain, and no need to get the job done quickly, the AC was then covered in plastic after the shroud was removed.
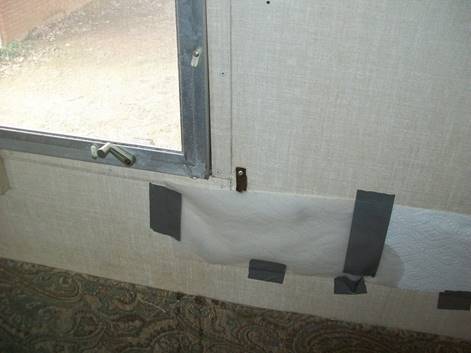
Although I really thought the bathroom leak originated at the AC, just to make sure, the window & A-I-R-S-T-R-E-A-M letters were protected with plastic to see if the water intrusion was, in fact, occurring at the marker lights.
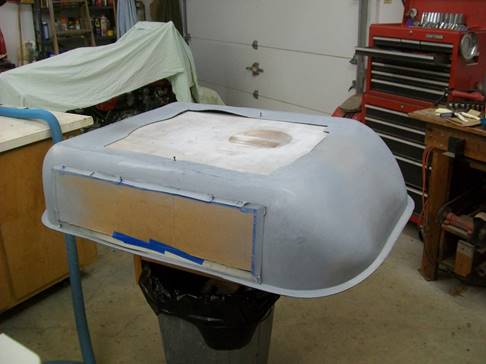
Shroud cosmetic touch-up was addressed during the rain of the next few days.
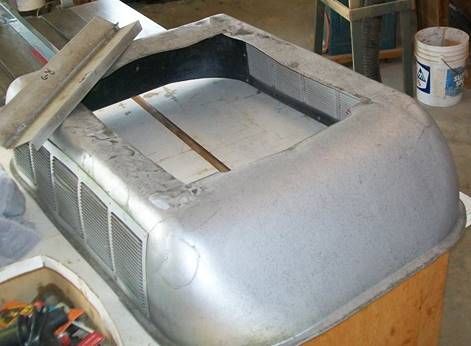
The 11 year-old repair was structurally holding up well. But, in what was no big surprise, just about all of the tiny amount of Bondo used during the repair had popped loose during 45,000+ miles of adventuring.
While the worst-looking areas are not visible from the ground when the shroud is mounted, the shroud could have just been painted with a thick coat of paint. But for hoot value, I decided to fill the cracks & voids with ABS cement.
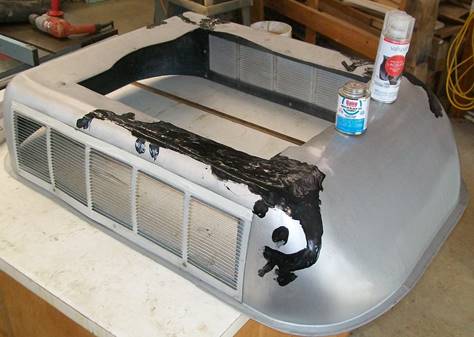
The effort took several coats over as many days with each coat being sanded smooth before subsequent applications.
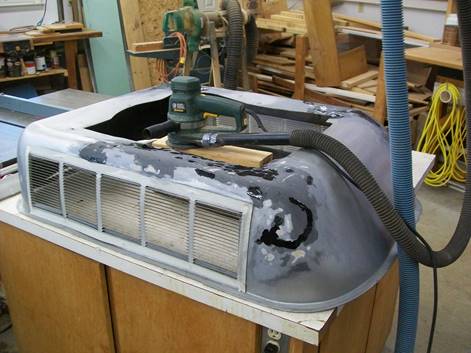
After countless coats of cement, the repaired areas received two coats of sandable primer. The shroud was then set aside to be painted when the weather improved.
Moving back to the Airstream, I was shocked to find that taping the window off below the marker lights had resulted in no water in the bathroom. So the plastic was then moved to below the letters.
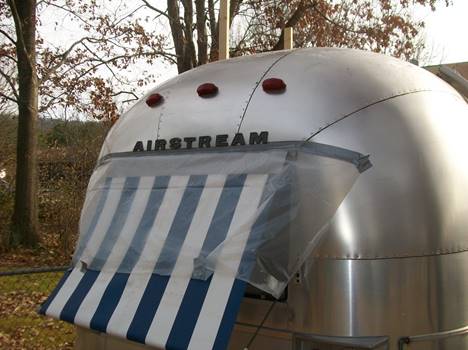
Within a half-hour of the next rain, the bathroom was wet again. So, after the next sunny day, the tops of the letters were re-sealed with ParBond. For good measure, the enclosed spaces in the “A”s & “R” were also gooped-up. Maddeningly, the bathroom still saw water after the next rain. In desperation, the sides of the letters were sealed in case there was some sort of capillary action going on. Voilà! No more leak.
In what is a rarity for January, we got a 70 degree day projected for the next Saturday – perfect for popping old sealant bonds.
Although I had resigned myself to the inevitability of removing the AC’s top half, there was no reason to be stupid during the effort. So the unit’s perimeter was scrubbed free in hopes of finding a crack or bullet hole or something.
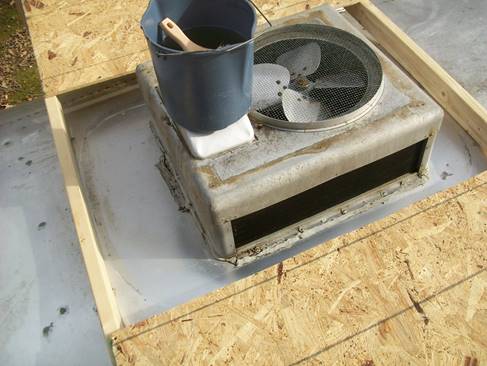
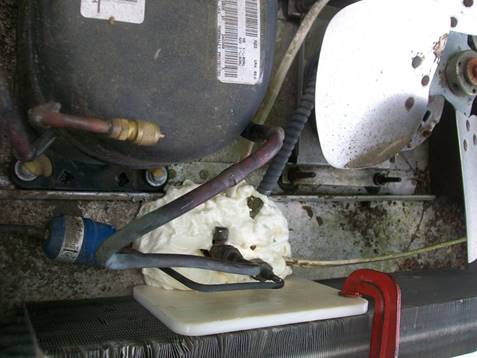
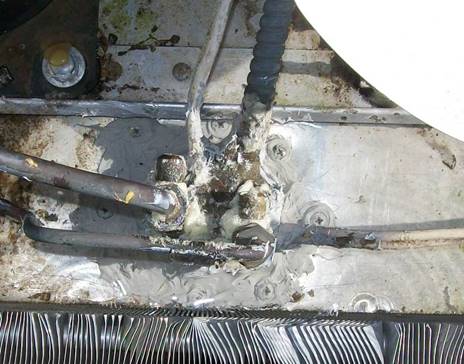
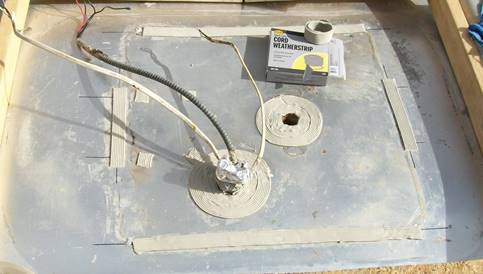
No luck – Other than a mildly loose Olympic rivet core, all looked well. Attention was then shifted to the plumbing/electrical pass-through hole. While removing the foam sealer, I noticed it had either debonded or had never bonded to a potential leak zone.
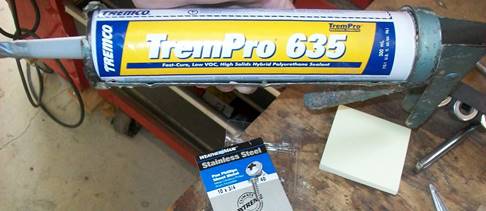
So after removing all of the foam and RV putty around the hole’s perimeter, the rusty mounting screws were replaced with a stainless steel version and the modern-day equivalent of Vulkem.
My trusty, drilled PVC pipe was then hooked to the hose and allowed to run for a while.
I started smiling after ten minutes into the effort when the wall stayed dry. But at fifteen minutes a deluge made its way down the inner skin.
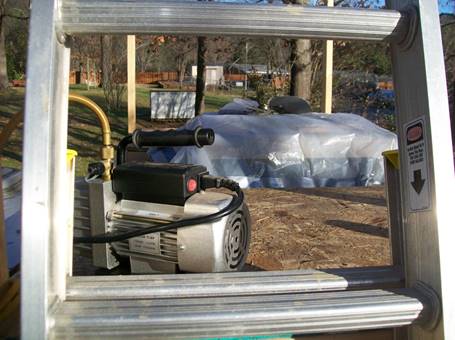
It was official now – the top half had to come off. The first step was to pull a vacuum on my recovery tank.

After getting that kicked off, the air conditioner was switched on to warm up the compressor. Between the fact that we were not able to get our cold-weather camping trip in last year, and the initial chill of the morning, the 50 year-old furnace was lit to give the AC some heat to draw out. It performed perfectly.
While all that was going on, I took the opportunity to spray a new coat of paint on the shroud.
The recovery tank was then stuck in the freezer to pre-chill. Afterwards, the tank was placed in a five-gallon bucket & covered with ice.
After lugging everything up the ladder, the gauges were attached. After purging the lines, the AC’s R-22 was then transferred to the tank thanks to the temperature differential.
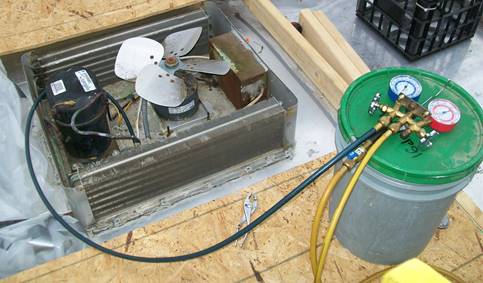
Normally, I would put the bucket on a scale. When the scale stops indicating weight gain, recovery is complete. But since I did not feel like lugging the scale up to the party, the whole arrangement was left in place for about an hour – more than enough time to accomplish the task.
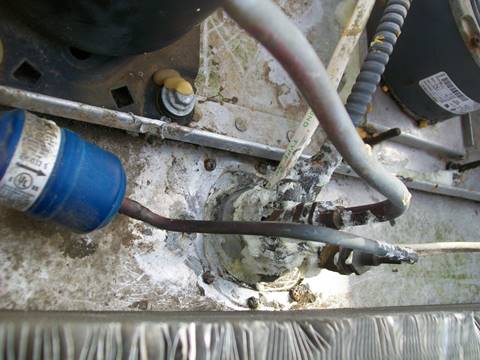
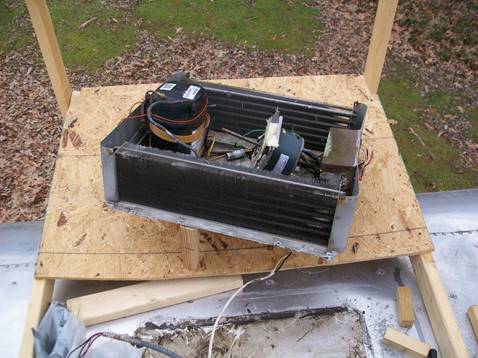
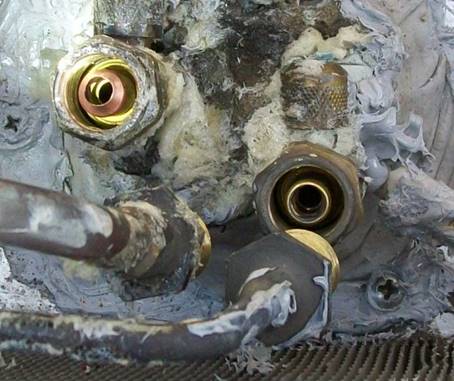
The refrigerant lines connecting the inside & outside units are joined at threaded unions – no cutting required. All wiring was connected with wire nuts or clamping screws inside the electrical box.
After removing all the hold-down screws mentioned so far, the unit still would not let go of the roof. I either did not know, or had forgotten about the screws around the fan motor shaft hole (I’ve replaced that motor twice in 11 years).
After removing the motor to access the screws, it was then a simple matter of deadlifting the unit over to the street-side work platform.
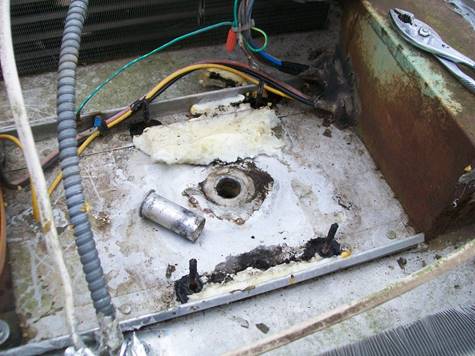
The RV putty around the skin holes was still amazingly workable.
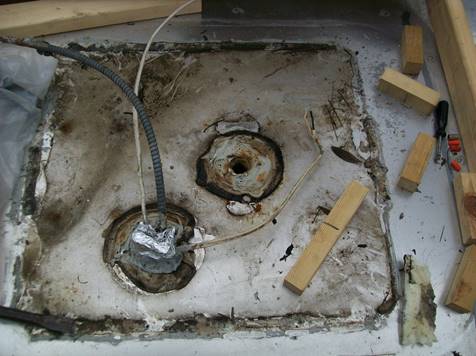
Blissfully, a minimum of two smoking guns, in the form of puncture holes, were found even before the area was cleaned.

Additionally, three other holes associated with the work done on replacing the compressor years ago were also noticed. But, for a variety of reasons, I do not think water leaked at those locations was ending up on The Boyz’ beds.
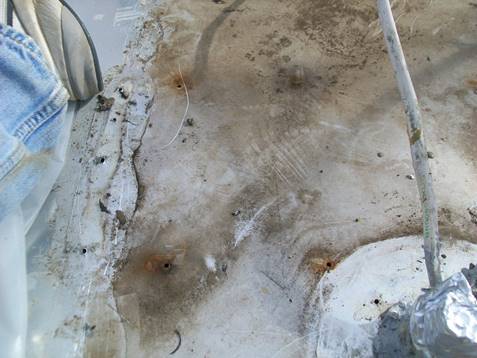
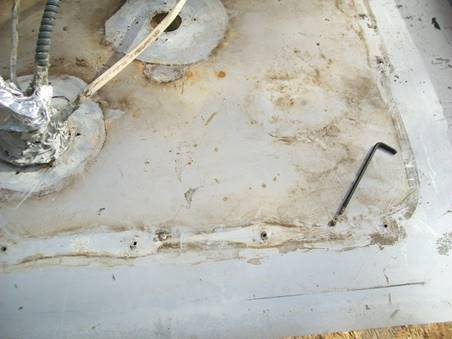
After a thorough cleaning, one other potential leak path was identified on the street side. But all-in-all the roof skin was in extremely good condition.
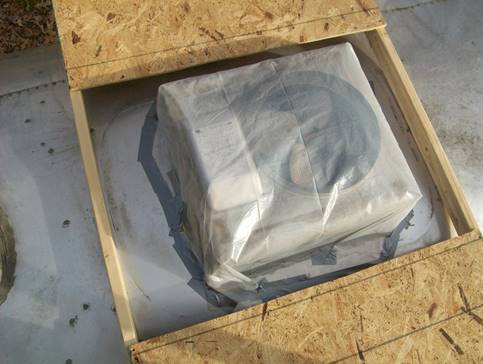
Well, that was enough work for this particular weekend. With rainy weather predicted for the following days, everything was waterproofed until the next warm opportunity for reassembly.
After several days of long, soaking rains, I was thrilled to NOT find any water leakage inside the Airstream. The challenge now was to maintain that record after reinstalling the AC’s top half. Thankfully, I was blessed with mid-sixties degree weather the next weekend.
All the unwanted skin holes found were drilled out to accept a TremPro-coated 1/8” brazier head rivet.
The local home improvement store supplied non-hardening putty for sealing all the screw holes. Although I could have ordered genuine RV putty from VTS, this is the same stuff used to seal my Overlander’s water heater against the elements 12+ years ago, and all is still well there.
After marking the screw hole locations, strips of putty were laid out in ways that had the best chances of long-term seals. One box was sufficient for the effort.
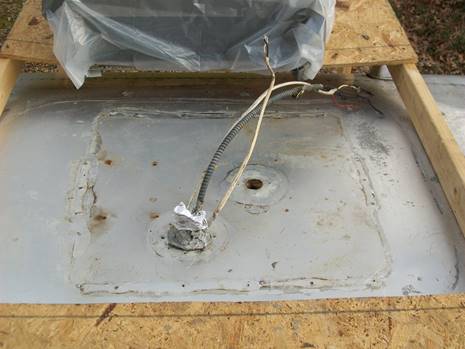
The AC was then dead-lifted to 2X2 blocks arranged around its general destination.

Nails were used to locate the original holes on the aft side of the unit.
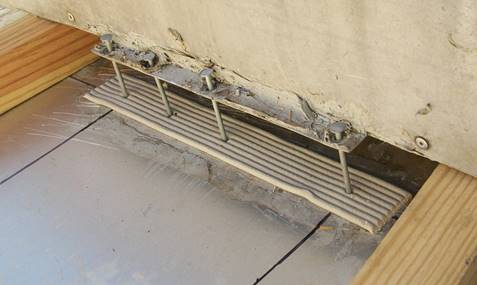
The aft side was then gently lowered onto the putty after the two blocks were removed. The procedure was then duplicated on the forward side with the goal of only setting the unit down once. Score!. Stainless steel screws coated with TremPro were then reinstalled just-snugged-in in all mounting holes. The screws were then sequentially tightened so as to get a uniform squeeze on the putty.
Next on the list was reconnection of the refrigerant lines. What appeared to be pieces of old copper crush washers were cleaned out lower halves of the unions.
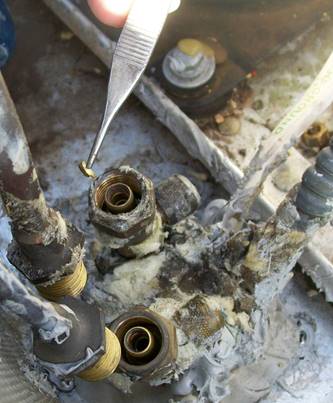
Oddly, both the Internet & refrigeration professionals I work with appeared to have never seen this particular union/charge port combo because I was unable to verify with finality that crush washer remains were what was fished out. But since we all agreed a replaceable sealing surface made a lot of sense, new ¼” AN-style, copper crush washers (sold as flare gaskets) were rounded up for the effort.
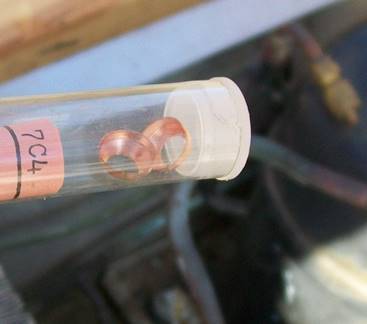
The washers fit beautifully.
A vacuum was pulled on the system after the lines were connected. After a quick valve-off showed no gross problems, the system was flushed with a whiff of recovered R22. A vacuum was once again pulled before valving-off the pump and allowing the system to set overnight.
My timing could not have been better for a test of my weatherproofing labor because the storm of storms followed that day’s activity well into the night.
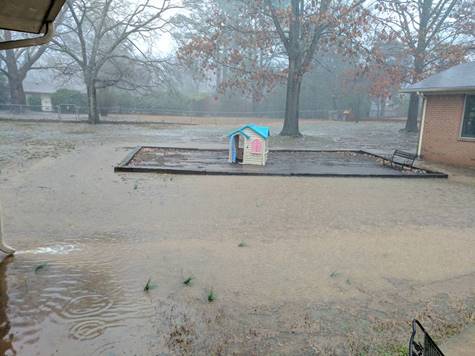
It was a great feeling the next morning to tour the Airstream and find no water on The Boyz’ beds. Further elation was realized when the Bay Breeze was found to still be holding a vacuum.
For the next test the AC was filled with just enough gaseous refrigerant to bring it up to a nominal R22 pressure. After the following Saturday found the system still pressurized, a heat tape was wrapped around a bottle of R22 before insulating it in a five-gallon bucket. The bucket was then lugged up to the platform where a scale was waiting for it.
As a final purge, the last whiff of R22 was vacuumed out of the unit. After swapping the yellow line from the pump to the gas bottle, final electrical connections were re-made while the 2 lb, 2-1/4 oz of refrigerant specified in the owner’s manual transferred in to the AC.
Success! The AC fired right up, and within a minute or two had cooled down both sets of evaporator coils. I think we’re good to go.
The platform sure was handy for the effort. While it would be nice to hold on to it, even disassembled (it is screwed, not nailed together), it is a lot of lumber to keep up with. I suspect it will be stored until a long 2X4 is needed for my next over-the-top project.