Air Conditioner Water Leak Repair
In what was the first new issue with my Overlander, vibration from our 1400 mile trip to Disneyworld in 2004 in the pouring rain (coming & going) caused a leak at the air conditioner. Slowly but steadily, water ran down the inside of the street side skin, and leaked out the top of the bedroom window. I was fairly certain the A/C was at fault because the roof top seams & vent stacks had been sealed within the previous eight months. But before the final pronouncement, all three roof vents were sealed with a significant amount of Vulkem. The leak persisted.
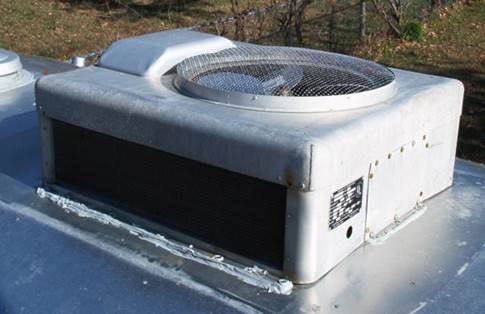
The proper way to proceed really had me wringing my hands in that there are just not that many places for an Armstrong A/C to leak. Unlike today’s drop-in units, Armstrongs are split units in that there is an interior unit, and an exterior unit. A three inch hole access hole for Freon & power lines, and a one inch hole for a fan shaft connect the two. Both of these ports had been resealed when the fan motor was replaced. The interior unit is obviously riveted to the ceiling. From what I had read, the exterior unit was riveted to the roof “with A LOT of rivets”. But I had not taken the time to make a firm determination on how it was connected while the new fan motor was being installed. So I went topside, and pulled the shroud.
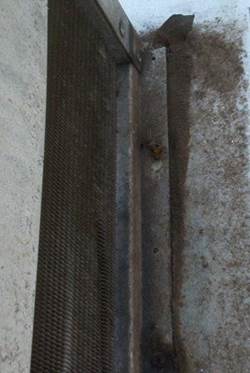
The shroud screws to the top of the unit, and to the Z-bar strips on either side. Removing the Z-bars, five very rusty mounting screws on each side were revealed:
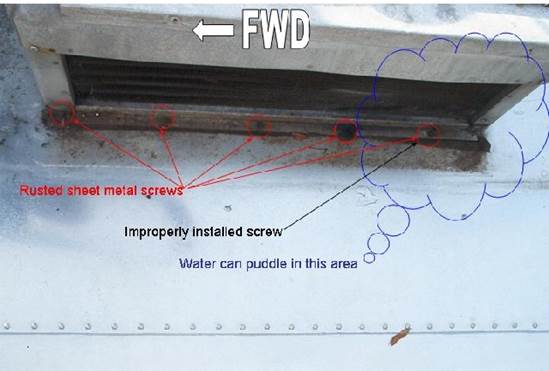
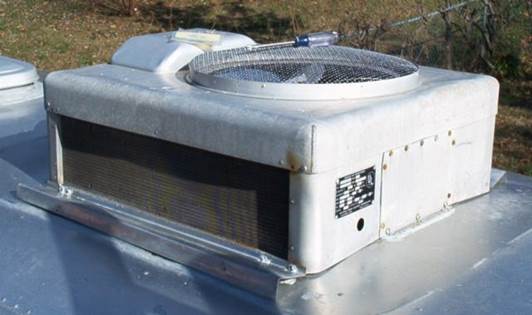
If you look closely at the middle picture, you can see a screw improperly installed at the factory. Consequently, I also noticed that water puddled in the same area. Talking with other vintage owners, I found puddling is not uncommon.
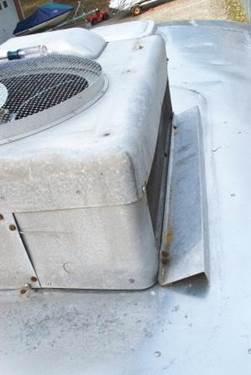
At this point, 16 screws have been identified which hold the exterior unit to the roof – five on either side, three forward, and three aft. Strips of RV putty had been applied to the roof before the unit was set in place to seal the screw holes. Since it was getting late in the evening with rain forecasted for nighttime, the improperly installed screw was removed before pumping the area full of Vulkem in preparation for an Olympic rivet. The hope was that this type of rivet would pull the depression out where water was puddling. It helped.
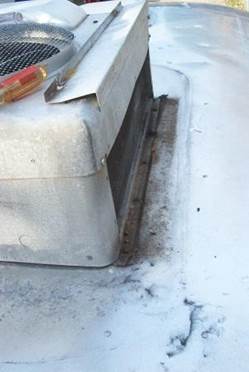
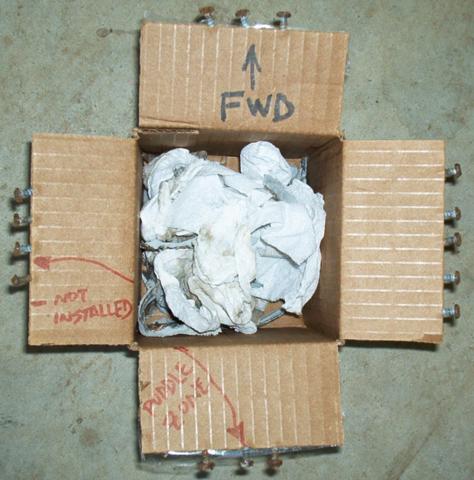
We had another monsoon that night (flood warnings & everything). The next morning I went out to find that, although the leak had been seriously curtailed, it was not totally gone. But I felt encouraged because the last rain left at least two cups of water in my drip pail, and now I was looking at maybe a tablespoon. Feeling encouraged, the remaining 15 screws were removed with vice grips since the screwdriver features had rusted away. Most of them had to break loose, so I figured those were still sealing. If you look carefully at the picture below, you can see rust on the shanks of the screws in the puddle zone. Those particular screws did not put up much of a fight coming out.
Whatever putty Airstream used to seal between the roof & the unit was still pliable. After removing the screws, I ran a putty knife around the sealing surfaces. The putty had de-bonded only in the “puddle zone” where the screws had loosened. And it was only between the putty & the unit, not the roof & the putty.
Instead of removing the putty, I cleaned everything & injected Vulkem between the sealing surfaces & into anywhere I thought water might go. Even with the screws removed, the unit would not lift up high enough to do a good job removing all the putty, so it was left in place. Also, it appears to me that running a bead of Vulkem would have been easier for the factory to originally do. Since they chose putty, I decided they may have been considering some aspect I have overlooked.
The original screws were 10X1/2 pan head sheet metal screws. All I could find locally in stainless steel were 10X3/4, but the extra 1/4 inch won’t hurt anything.
The shroud was re-installed with 8X1/2 pan head stainless steel sheet metal screws.

Even though the shroud was going to cover up either however good or bad my Vulkeming job ended up, I thought it came out looking pretty good. But regardless, I am happy to report that new screws & Vulkem fixed the leak. J