Sam Buchanan's Strip Canoe Project
Sam's Construction Log, page one
Gil Gilpatrick's book, Building a Strip Canoe, is serving as the foundation of this canoe project. After carefully reading the textual descriptions of the eight designs included in the book, I selected the "Laker" as my project, which is an adaptation from a 1970's Popular Science article. This canoe was picked because of the broad flat bottom, absence of rocker, and ample tumblehome which should make it very suitable for casual use by novice paddlers. However, I wanted a slightly larger canoe, and wasn't too crazy about the lines of the Laker's stems. Consequently, I decided to add one inch to the station spacing on the strongback, and extend the stems two inches each so the 16' Laker would become a 17 footer. Another change was the incorporation of the stems from the 18.5' "White Guide". I like the White's profile better than the Laker's, so the 17' Buchanan Laker will have White stems. This is an example of how canoe plans can be easily modified within reason to achieve a design that is personalized to your wishes.
There are multitudes of canoe plans available from catalogs and the internet. Since this first project is intended to introduce me to the strip process, I decided to go with one of Gilpatrick's plans. Besides........it was already purchased!
(3/4/00; lofted patterns)
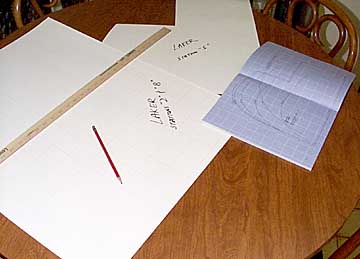
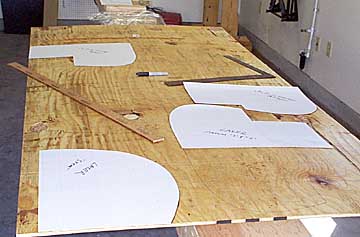
The plans in the book are presented in 1/2 scale, so it is necessary to loft them up to full size. I found some poster board in the nautical section of WalMart (?) that was ruled with 1/2" grids. A red pencil was used to overscore the grid to produce 2" squares.
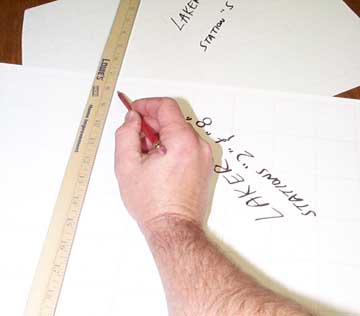
A combination of measurements and freestyle drawing was used to transfer the patterns from the book to the poster board, and the full-size templates were cut from the poster board. Each pattern is half of a station that will end up on the strongback, and all the patterns except the center station are used twice.
(3/5/00; constructed strongback)
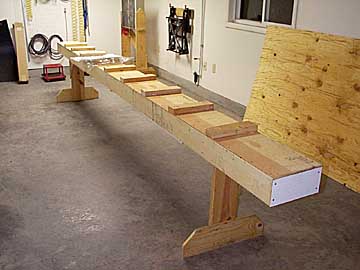
The strongback is the foundation of the entire project. The stations, consisting of 1/2" CD plywood cut per the full-size patterns, attach to the 2x4's on the top of the strongback. There are many ways to construct the strongback ranging from simple and crude to elaborate. Keep in mind that the only task assigned to the strongback is the proper alignment of the various stations. There is no need to get overly fancy with the strongback since it is not what you will be paddling down the river! Reserve the extra attention to detail for the finishing touches on the canoe. The strongback only needs to be sturdy, not pretty.
This strongback is two 12' 2x6's and one 8' 2x6 cut to make two 16' 2x6 beams. Scrap 1/2" plywood on top of the 2x6's holds everything straight and square, and two 2x8 legs hold the whole contraption about 28" off the floor. The lumber is held together with drywall screws. The 12" 2x4's on top are spaced 19" for the stations (remember, we are adding an inch to the standard 18" spacing so we end up with a 17' canoe after the stems are likewise extended two inches each).
Total cost for the strongback was about $15 plus some lumber scraps I had in the shop. The strongback will be given a few days to warp or settle if it wishes before I install the stations. The two sheets of plywood against the wall will soon become the stations for the new "Laker".
(3/6/00; transferred patterns to plywood)
The patterns need to be transferred to plywood to form the stations. Two sheets are sufficient with about 1/3 sheet left over for odds-n-ends. A bit of creativity will allow the stations to be cut with minimal waste.
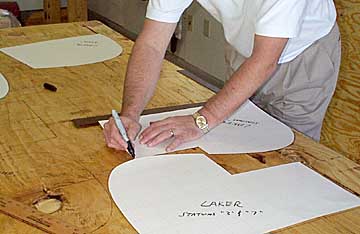
A line is drawn with a framing square perpendicular to the edge of the sheet. This becomes the centerline of a station. The pattern is butted up to the line, traced around the edges, flipped over to form the other half of the station and traced again. The centerlines will be useful in aligning the stations on the strongback.
Don't forget to label each station with the canoe model and station number!
(3/7/00; cut and attached stations to strongback)
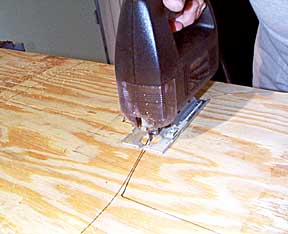
The stations were cut out of the plywood with a saber saw. A few quick passes on the belt sander smoothed the fuzzies left by the saw.
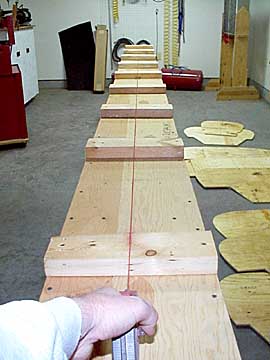
A line was chalked down the middle of the strongback.
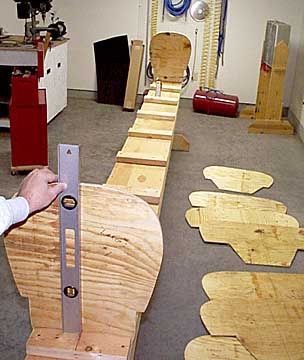
It is important to get the stations properly aligned in relationship to each other. A good way to do this is to center the stations on the strongback center line (this is why we wanted a center line on each station), then plumb each station with the station center line. Here station #1 is being centered and plumbed. Be sure each station is attached to the proper side of the 2x4's on the strongback. The end stations (#1 and #9) need to be inboard of the 2x4's so we can remove the screws holding them in place when it is time to remove the canoe from the strongback.
A string was pulled between stations #1 and #9 via the center lines on the stations. Now each additional station can be added, making sure each centerline is aligned with the string.
(3/8/00; attached stems to strongback)
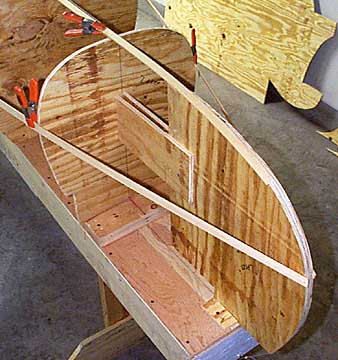
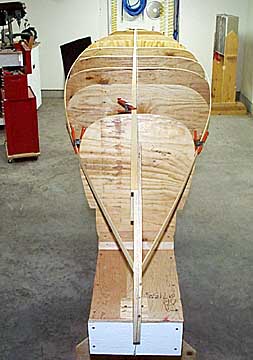
Here is a detail showing attachment of a stem to the strongback and final station. Standard spacing of the stem from the station is 24", but I am using 26" since this is part of the "stretching" of this canoe from 16' to 17'. We have to look ahead to when the hull will be lifted from the stations, and assure that we preserve a way to remove the stems so the hull can be readily detached from the strongback. This is not the place for screws that can't be accessed once the hull is stripped!
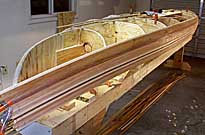
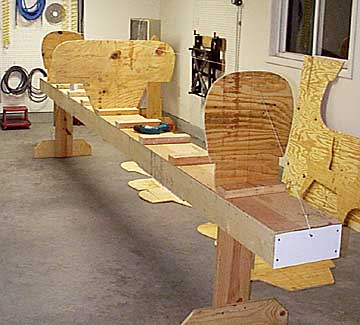
Now we get the first impression of the canoe's shape! I ran some pine strips to firm up the stations and to check that I hadn't introduced some unwanted ripples to the patterns.
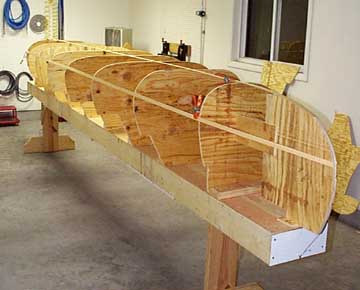
We are just about ready to begin stripping. The stations will have masking tape applied to the edges so we can't glue the hull to the patterns. The stems will be shaped to a taper on the outside radius so the strips will fit snugly.
Now.............we need to round up some Western Red Cedar...........