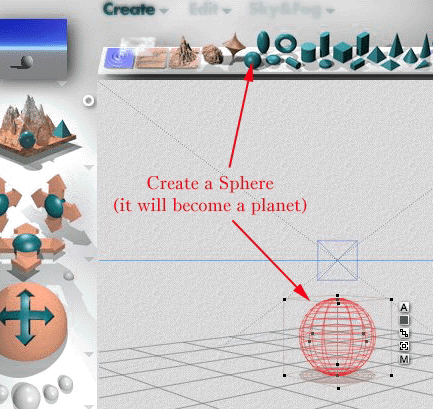
Put something out there to see, like a sphere. It'll make a nice planet later.
|
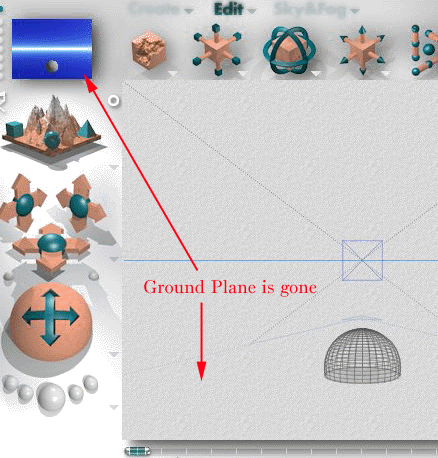
Using the Edit screen, reposition the sphere into the ground plane, so that it is partially obscured.
|
Select the ground plane and then delete it.
|
Using the Display Palette on the Right side, turn on Underground Visibility, so that the wireframe will look correct.
|
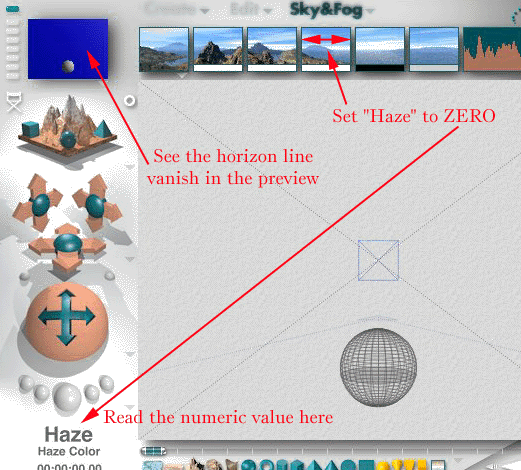
Using the Sky&Fog page, set the "Haze" numeric value to ZERO. Note the dramatic difference in the preview.
|
|
or: use the pull down menu to "Edit SkyFog"
|
"Disable Sunlight" and/or "Link Sun to View" according to your own needs (I set them this way so that the sun becomes a real, useable object). Click on the check mark. |
Look through the camera
|
Using the "Sun Control" as a trackball, move the sun so that the camera is looking (more or less) directly at the sun. With the default (current) camera location, the sun will be very near the horizon. |
|
Then, set the colors for the first two parts of the sky color. Set them to identical shades of black ("Solar Halo" and "Sky Color", remember that we turned off "Haze Shift" earlier).
|
To get an exact match, use the eyedropper to directly sample the Solar Halo color. |
If you render the picture now, you will have both the sun and the stars in the image at the same time.
Of course, this image still has errors in it. For one thing, we can SEE the dark face of the planet. Not likely in the real experience. |
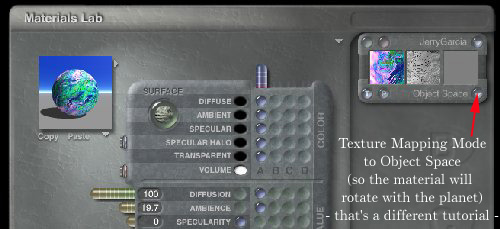
Apply a texture to the planet. I used Psychedelic JerryGarcia, as shown in the Materials lab (Don't forget to set the material to "Object Space" like I frequently do).
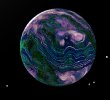
A rendering now clearly shows the features on the dark side of the planet:
still = Not Very Realistic, because the dark side is still visible. - What to do? |
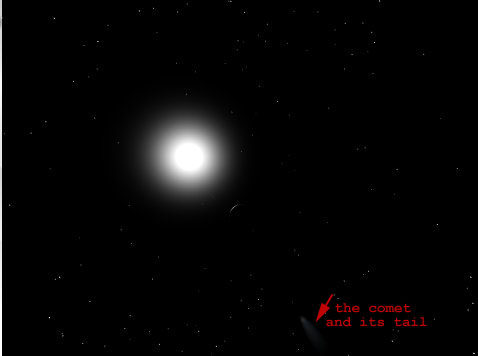
Now, a render of the planet shows the expected arc:
Or, are they cities on the planet's surface? I think they're specular highlights, but that's a subject for a different tutorial. |
By the way: you may be having problems: such as blurry/fuzzy parts in the image. Like astronomical observatories, these generally come from atmospheric interference. You're luckier than an astronomer. You can clean it up.
similarly, set the fog values to "0 0" Set cloud height to "0" Set cloud cover to "0" |
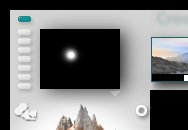
But, you say, "Where's the Comets? I wanna see COMETS! We SET the comets, by golly!" And I assure you they are there. But, how to find them?
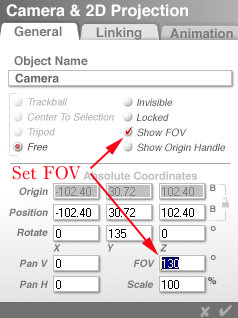
use the "Control Camera Options" pull-down menu, and select "Edit Current Camera" |
Change the Field Of View (FOV) from 60 degrees to 130 degrees.
Look what happens to the preview.
|
Render the whole image at fine resolution. And there it is, a comet in the lower edge of the picture, in line with the illuminated planet and their star.
Now some camera changes can be made (alter the angle and field of view, ...) to emphasize the planet. |
|
| All images and material on this page Copyright © 1998, Martin Hongsermeier. |
1998
06 11: |

 But, the sphere is still partially obscured!
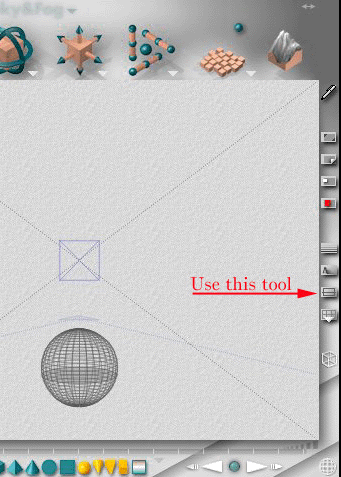
 then,
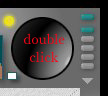
either: double click the "Sun Control"
then,
either: double click the "Sun Control"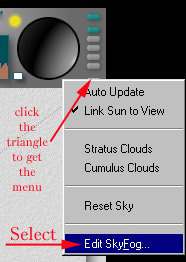 and
then select the "Sun & Moon" tab.
and
then select the "Sun & Moon" tab. Select the Starfield and Comets.
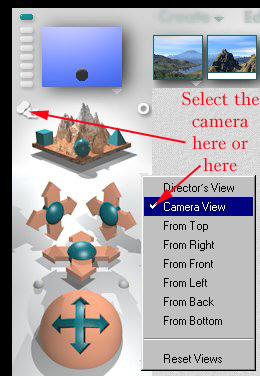

 From the "Sky Options" pull-down menu, select "Custom Sky"
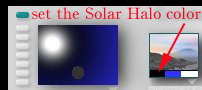 "Solar Halo" set to Black
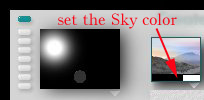 "Sky Color" set to black.
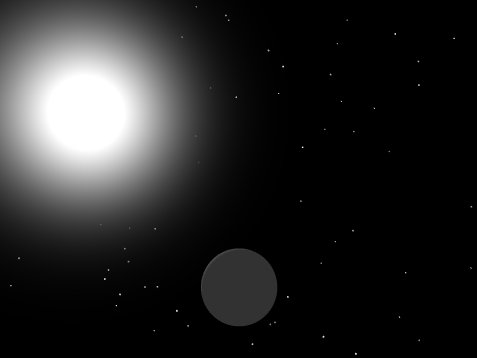
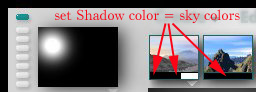 Set the colors of the shadows to the very same black as the sky colors.
 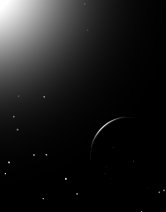 But, what's this surprise? Are stars visible through the planet's body?
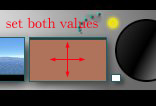 Eliminate the earthly clouds by setting the cloud frequency and amplitude to "0
500"
Eliminate the earthly clouds by setting the cloud frequency and amplitude to "0
500"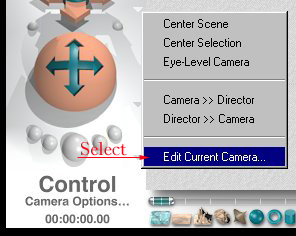
 Voila!