Back to tying the tie
Back to the main necktie page
Donning a Tie Tack
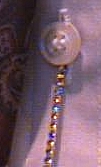
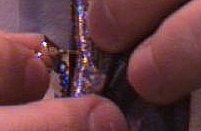
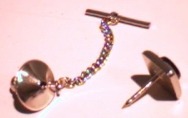 First, familiarize yourself with the two parts to a tie tack (sometimes
called a tie pin). The back, or base, is shown here on the left with a little chain attached to it. The pin is the decorative (and obviously sharp) part on the right.
First, familiarize yourself with the two parts to a tie tack (sometimes
called a tie pin). The back, or base, is shown here on the left with a little chain attached to it. The pin is the decorative (and obviously sharp) part on the right.
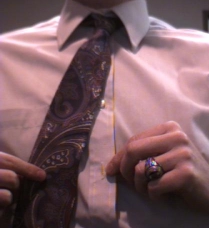 Unbutton a button for your tie tack. Select one low enough that it will
keep your tie out of food, water fountains, and computers. Have it high
enough that it's at a decorative height (near, but perhaps just below the
middle of the tie).
Unbutton a button for your tie tack. Select one low enough that it will
keep your tie out of food, water fountains, and computers. Have it high
enough that it's at a decorative height (near, but perhaps just below the
middle of the tie).
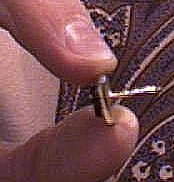
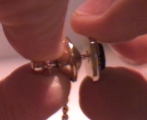 Pulling the tie tack apart is a two-step process. First, you pull the little knob on the base away from the rest of the base. Second, you pull the base away from the pin. Use your thumb and index fingers to grasp the knob and push against the rest of the base, then draw the base assembly away by moving your hand.
 Slip the little metal cross piece for the base through the button hole from
the front to the back.
Slip the little metal cross piece for the base through the button hole from
the front to the back.
 Button the button.
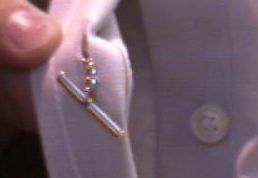
 Get ready to insert the pin.
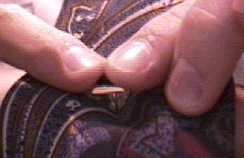 Push the pin through the necktie. The pin should be centered left-to-right
on the tie, and it should be at about the same height as the button you've
chosen (to prevent breaking the little chain). See that the wide and narrow
parts of the tie are equally taught while you insert the pin through each,
or you'll have a bow in your tie.
Push the pin through the necktie. The pin should be centered left-to-right
on the tie, and it should be at about the same height as the button you've
chosen (to prevent breaking the little chain). See that the wide and narrow
parts of the tie are equally taught while you insert the pin through each,
or you'll have a bow in your tie.
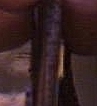 Here's an edge-on view of the pin through the tie.
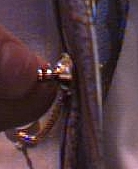 Put the point of the pin into the small hole in the base.
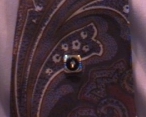 Straighten the pin.
All finished!

Now you're ready to go and conquer the world with your new neck tie tying
skill!
Back to tying the tie
Back to the main necktie page
Questions? Comments? Send them to me: jimes@hiwaay.net